Mousse Cakes their beauty and unusualness have captured the minds of confectioners all over the world and are rapidly conquering the hearts of customers. How to pass by when the cake sparkles with icing, beckons with an unusual shape and generally looks more like a toy than a dessert!
For the first time, mousse appeared on the gastronomic scene in 1894. True, then “mousse” was called vegetable or fish snacks whipped and fixed with gelatin.
But in the early 1900s, the famous French artist Toulouse Lautrec I came up with the idea of combining chocolate with egg whites whipped to an airy foam. Only then was he called "chocolate mayonnaise"(mayonnaise de chocolat), and later this not the most successful version was replaced by a more appetizing name. Today, in almost all cafes and restaurants in France, the dessert menu is headed by this velvety dessert.
Throughout the 20th century, mousse gained popularity and changed at the same time. They began to add sugar to it, replaced the proteins with whipped cream, yolks, butter. Mousse has become not only chocolate, but also vanilla, caramel, nut, fruit. Today, mousse is one of the main elements of high confectionery art.
Four basic elements of a mousse cake: biscuit, mousse, filling (or several fillings) and topping. It is in the choice of each element, its taste and texture, which should be in harmony with the overall flavor range of the cake, that the skill of the confectioner lies. Each of the four components - dessert is prepared separately, in the following sequence: filling (cream, coolie, compote, ganache, confit), which is frozen; biscuit (if necessary, also frozen), mousse and coating.
Cake Kir Royal

Cake assembly. The mousse is laid out in the first layer, then the fillings are dipped into it, then there can again be a layer of mousse and the biscuit is laid last. In this form, the cake is frozen. finished cake you need to cover with velor or glaze. Velours- This is a mixture of chocolate and cocoa butter with the addition of dye. Velor is applied with a spray gun. Glaze can be prepared with condensed milk, chocolate, caramel or fruit juice. Water-soluble and fat-soluble dyes can be added to the glaze.
Chocolate velor

Chocolate velor
50 g white chocolate
25 g cocoa butter
fat-soluble dye
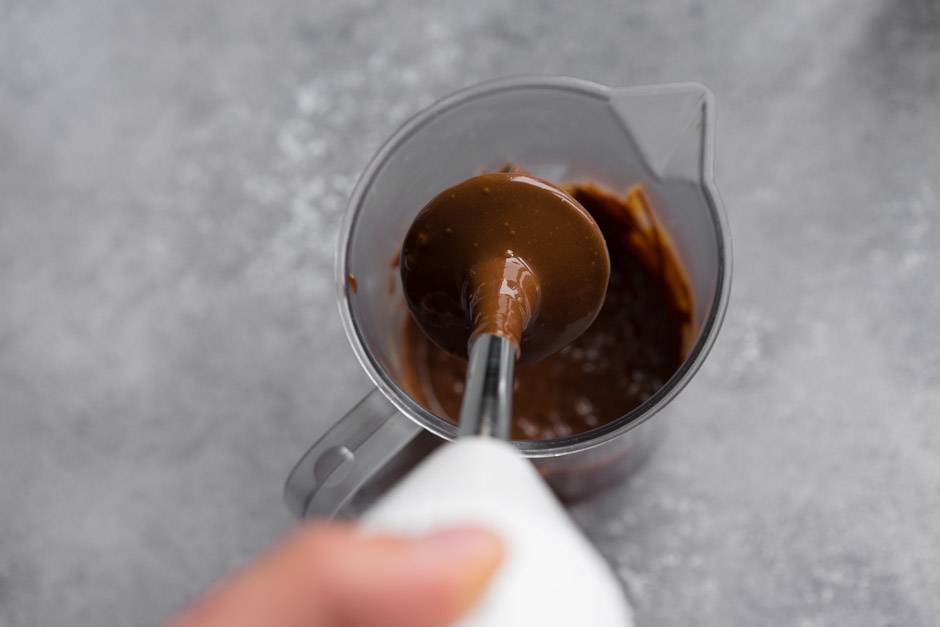
1. Melt chocolate and cocoa butter separately, then mix. Add dye and blend with a blender. Working temperature ready mix should be 50 °C.
2. Spray with a spray gun or airbrush on a frozen product.
The more cocoa butter in the paint mixture, the thinner and finer the velor will be. The ratio of chocolate and cocoa butter can be varied, bringing to the proportion
50/50.

Sectional chocolate velor
Gourmet glaze with nuts

Gourmet glaze with nuts
300 g dark chocolate
100 ml unscented vegetable oil
500 g roasted nuts
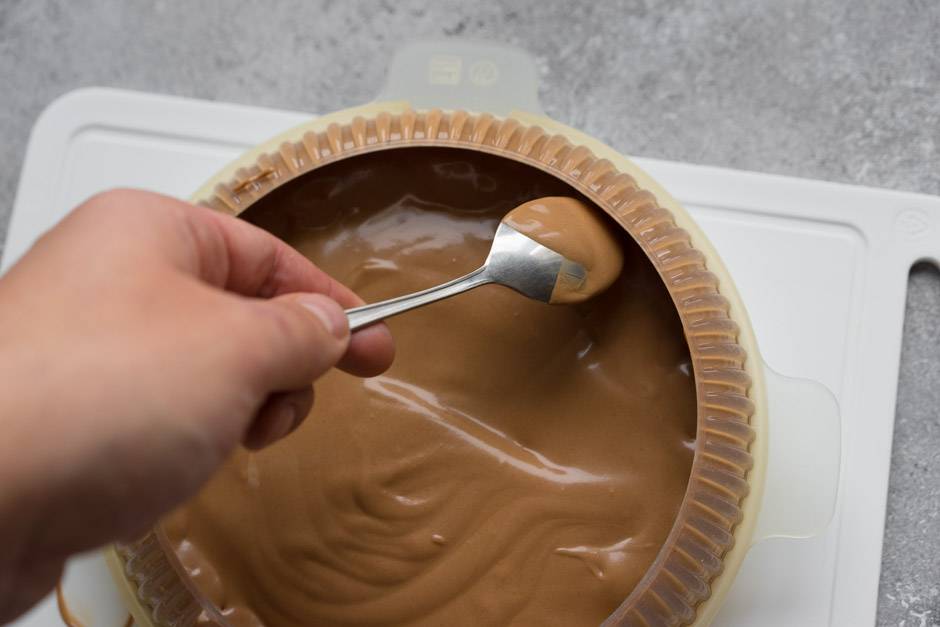
- Finely chop the nuts. Melt the chocolate in the microwave in pulsed mode at intervals of 10 seconds. Pour in portions vegetable oil, mixing well until smooth. Add nuts and stir.
- Remove the frozen blank, mix the icing well and immediately pour it onto the product so that the nuts do not have time to settle to the bottom.
- The working temperature of this glaze is different, it all depends on what you want to get. The hotter the glaze, the thinner it will fall on the product. But it should not be very hot, otherwise the mousse product will begin to melt.
The best way to check if the temperature is correct is to dip your finger into the frosting. It should feel slightly warm to the touch.

Gourmet glaze with walnuts in cut
Greetings friends!
New Year rushing towards us... ❆ ❆ ❆
We urgently need to decide something about the New Year's feast. Well, aspic and cabbage rolls are not my thing. As for the dessert, I definitely recommend it. I even insist on trying this wonderful mousse cake recipe, which we will look at in detail today.
This recipe may seem somewhat intricate and time-consuming to you, but the advantage of this cake is that it can be done in stages 3-4 days before the holiday.

And if you disassemble this mousse cake into its component parts, then everything will turn out simply and clearly: the most ordinary biscuit, a jelly layer of juice, and two types of mousse, which are prepared according to the same principle: Anglaise cream (the same custard, only without starch ) + whipped cream and gelatin.
I must say that mousse cakes are not as scary as many people think. It is worth trying once and you are on a horse!

You just need to do everything as I show below, and you will be happy on New Year's Eve.
Although there is one BUT: For the preparation of mousse, we cannot do without cooking thermometer. If you want to be in trend, be sure to get yourself SUCH or even THIS IS - WITH A REMOVABLE SPATULA . Cool!
If you don't have a cooking thermometer, it is better to replace the mousse filler with whipped cream, for example, mixed with strawberries and the remains of a biscuit. Or cook cheesy or cream cheese. It will be great too.
I’ll make a reservation right away that for those who don’t have time or desire, instead of a biscuit, you can put ready-made cookies savoyardi, after sprinkling them with 150 ml of juice, milk or (for stronger lovers) alcohol. Although, I think, for the New Year, this alcohol would be more appropriate to drink inside.
In total, we have:
Step by step mousse cake recipe
Ingredients:
For the biscuit:
- eggs - 225 gr. (≈4 eggs)
- sugar - 150 gr.
- vanillin - on the tip of a knife
- salt - 1 gr.
- flour - 75 gr.
- starch - 75 gr.
- butter - 20 gr.
For syrup:
- sugar - 50 gr.
- water - 50 ml
- cognac / rum / liquor - 1 tbsp.
For the pomegranate coolie:
- pomegranate juice - 250 gr.
- sugar - 50 gr.
- gelatin in plates - 7 gr.
For the berry mousse:
- fresh or frozen berries (raspberries, strawberries or mix) - 250 gr.
- sugar - 70 gr.
- vanilla extract - ½ tsp or vanillin - on the tip of a knife
- egg yolks - 3 pcs.
- sheet gelatin - 10 gr.
For chocolate mousse:
- milk - 250 ml
- sugar - 60 gr.
- egg yolks - 2 pcs.
- sheet gelatin - 10 gr.
- black chocolate, chopped (≈50%) - 50 gr.
- heavy cream (33-35%) - 200 gr.
For decoration:
- heavy cream, whipped (33-35%) - 200 gr.

* I will make a reservation that to simplify the procedure, pomegranate coolie ( jelly layer) can be omitted.
Cooking:
For the biscuit:


For the pomegranate coolie:
*It can also be prepared the day before and left in the freezer.

For syrup:
- Heat water with sugar in a small saucepan and bring to a boil.
- After the syrup boils, remove the pan from the heat and add alcohol. Leave until completely cool.
Assembling the mousse cake:

For the berry and chocolate mousse:
- Soak gelatin sheets in cold water.
- In a small saucepan, bring the berries and ½ sugar (35 gr.) to a boil.
- In a separate bowl, beat the egg yolks with the remaining sugar and vanilla.
 When, after 5-10 minutes, the berries soften, knead them with an immersion blender until a berry puree is obtained.
- After boiling, pour part of the berry puree into the yolks and mix with a whisk.
- Reduce the fire to a minimum and return the yolk mixture to the saucepan.
- At constant stirring With a whisk, bring the mixture to a temperature of 82º and immediately remove from heat.

- Add squeezed gelatin to the berry mass and mix thoroughly until it is completely dissolved.
- Cool down berry cream in an ice bath be sure to periodically stir with a whisk. It may take 15 minutes, or maybe half an hour.
For an ice bath, put a saucepan with strawberry cream into a larger container with water and ice. This is done so that the cream cools faster.
Attention! The cream should not thicken much, it should cool down to a temperature of about 35º. At the first sign of thickening, immediately remove the mousse from the ice bath. Check the temperature of the cream periodically with your finger: to the touch, the cooled cream should not seem to you either warm or cold, which means that the cream has reached 36º.
 Whilst the cream is cooling, whip the cold cream to soft peaks and fold gently into the cooled mousse (I added a couple more strawberries for an effect).
- Pour the berry mousse into a pre-prepared biscuit shell and send it to the refrigerator for 1 hour.
 While the first layer of mousse is cooling down, prepare the second - chocolate layer, according to the same principle as strawberry ⇑, only we replace the berries with milk: boil the milk with half the sugar, mix the yolks mixed with the second half of the sugar, and bring the mixture to 82º on minimum heat .
- After the temperature of the cream reaches 82º, remove the pan from the heat, add the squeezed gelatin and mix thoroughly until completely dissolved.
- Add chopped chocolate and mix again. We cool for several minutes in an ice bath, stirring regularly with a whisk, and after cooling, we also gently mix with whipped cream.

- Put the pomegranate coolie on the frozen berry mousse, and the cooled chocolate mousse on top.
- Put the remaining strips of biscuit on top of the chocolate mousse and soak them with syrup with a brush.
 We stretch the cling film over the biscuit and send the mousse cake to the refrigerator until completely solidified for several hours or overnight.
- We take the cake out of the mold, remove the film and decorate with whipped cream, berries, etc.

The advantage of this mousse cake recipe is that you don't need Silicone molds. It is prepared in any deep bowl covered with cling film.
Good luck, love and patience.
Have you noticed that after complex desserts with a lot of flavors, you are drawn to something understandable, simple and even slightly ordinary!? If you said yes, read on. I made a cake that will surprise not with the number of combinations and strange ingredients, but with how the most recognizable and well-perceived flavors and textures work together perfectly. The base is, of course, chocolate. We have chocolate mousse with a slight bitterness and a base of Breton shortcrust pastry- a new type of dough for us, which crunches and crumbles well, but at the same time is very airy.
Then I thought of the phrase "The icing on the cake" as a happy completion of the job. “Excellent,” I decided, “so the second taste has been found, it will be cherry.” We have a layer of compote with the sourness of whole cherries, which, with their meatiness, will dilute the tenderness of the mousse and play in tandem with the texture dough. For the third taste, I took an equally popular pair for chocolate - orange. Here it is a creamy, incredibly delicate layer with a bright orange flavor and a moderate sweetness of white chocolate.
Often the glossy details leave puddles on the velvet finish of the dessert. Therefore, I will teach you how to make indentations in mousse desserts of any shape, where decor elements fit and all the flaws are hidden. My "Illusion" cake - because many people will think that there is an apple on top and, only after cutting, they will understand how wrong they were, because the outside of the cake spoke, about the internal content - cherry! Then everything will fall into place and you will calmly enjoy voluminous chocolate, perky sourness of cherries and a soft citrus note of orange in white chocolate. The illusion of the cake is also in the fact that seemingly simple elements can pleasantly surprise with their depth and perfect combination.
We will continue to deal with you in "". If you are a beginner, try to read all the steps carefully (in advance) and follow them exactly. I will indicate all possible substitutions of ingredients during the manufacture of the dessert and in the “Note to the hostess” block. The rest is up to you.
cherry compote
- Cherry juice - 190 g
- Alcohol - 10 g
- Gelatin Ewald - 4 g
- Sugar - 50 g
- Vyshnya - 100 g
This layer is quite simple to understand and execute. But the good thing is that it is universal and very convenient to use. In general, compote is a confit with berries or pieces of fruit. It makes no difference whether you use fresh or frozen foods, it is only important to get rid of excess moisture.
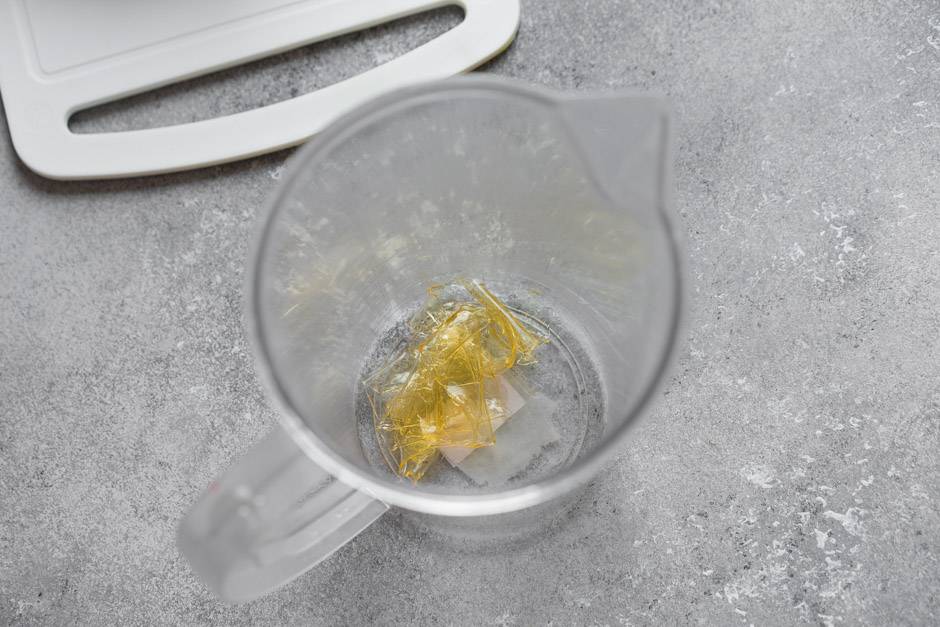
Let's start by soaking the sheet gelatin (4 g) in ice water. Now there is a separate material "".
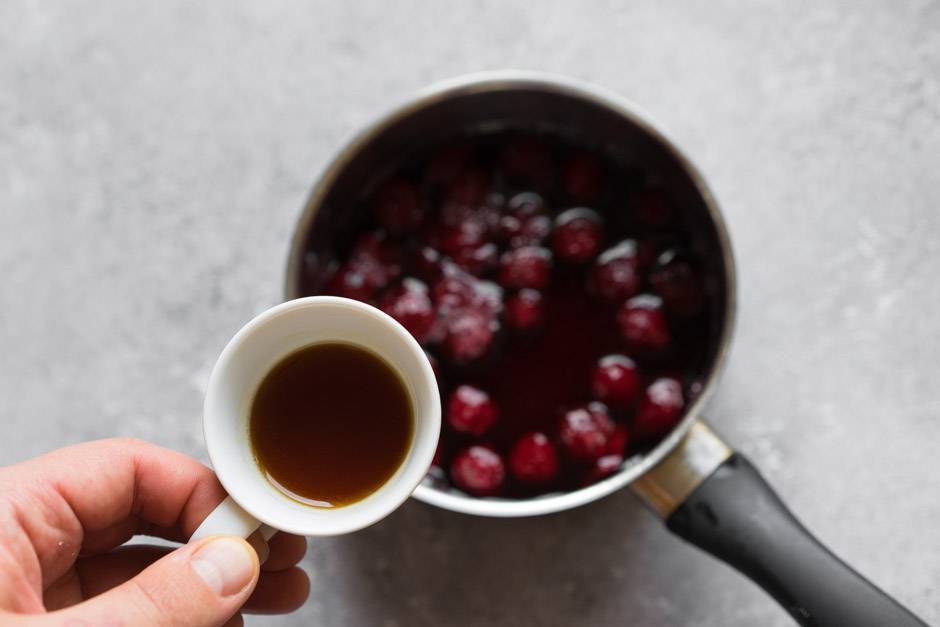
In a small saucepan, combine cherry juice (190 g), cherries (100 g), alcohol (10 g) and sugar (50 g). Put on the stove and bring to a boil.
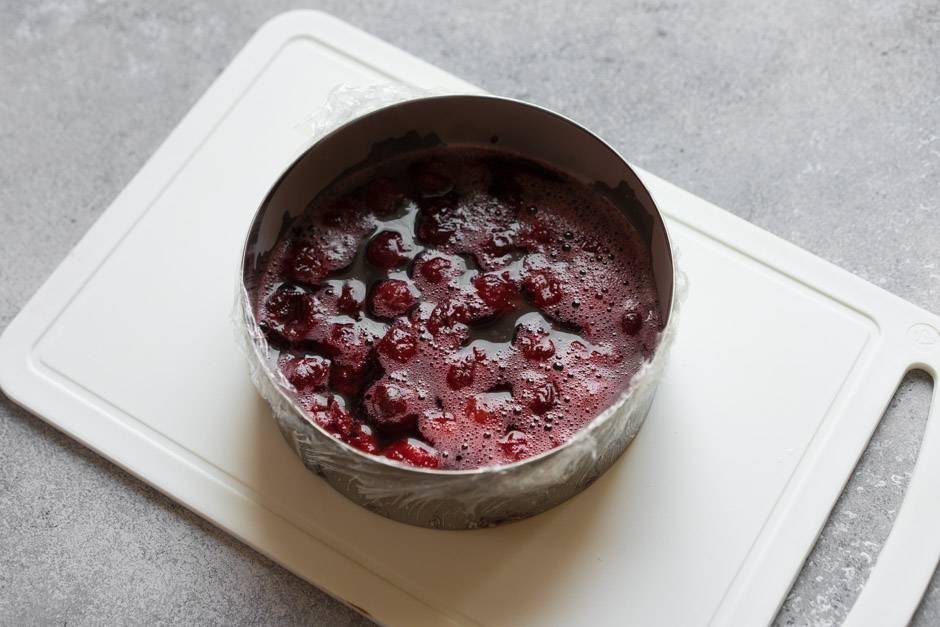
At this time, stretch the film over a ring with a diameter of 14 or 16 cm. To do this, grease the side of the ring with a wet hand, put the film on top of the ring and stretch it like a drum. Due to the wet walls, the film adheres well to the ring.

Ready gelatin wring out and throw into a glass.
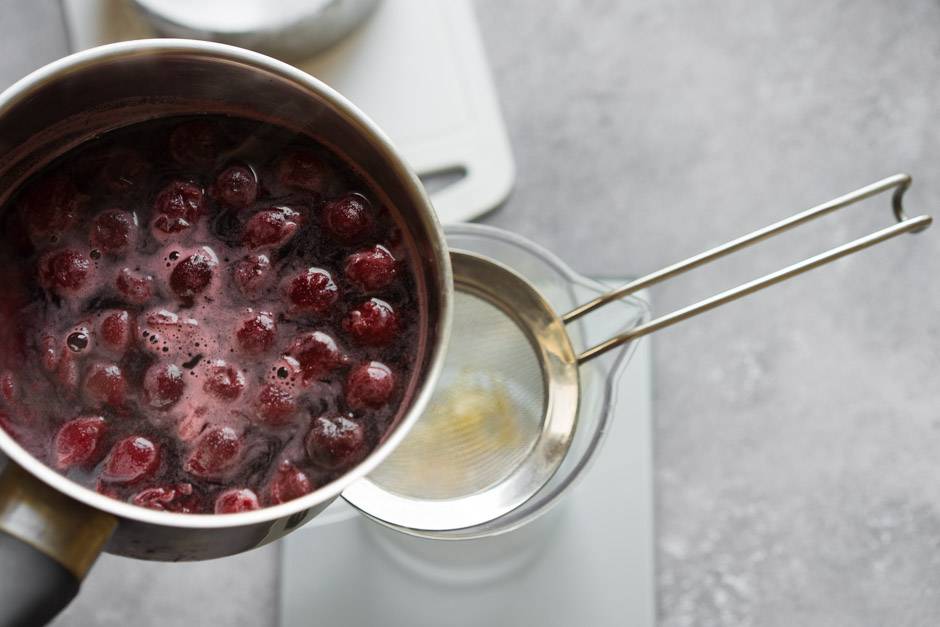
Now the most important, strain exactly 200 grams of liquid into a glass with gelatin through a sieve. And leave the remaining berry in a sieve so that all the free juice drains.
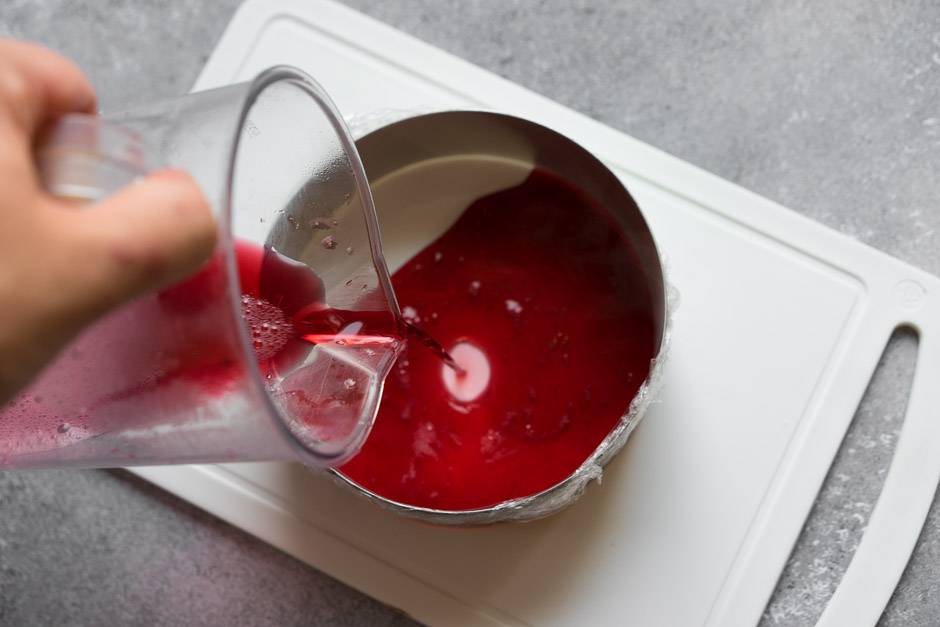
Stir the gelatin into the juice and alcohol with a spatula and pour into the ring. If the ring is 14 cm, it is worth laying the sides with an acetate film to make it easier to remove a rather thick block of filling later.
Manually spoon the cherries (without excess juice) into the ring using a spoon.
Breton pastry (sable Breton)
- Yolk - 1 pc.
- Powdered sugar - 40 g
- Cocoa powder - 12 g
- Flour - 45 g
- Baking powder - 3.5 g
- Butter - 50 g
- Salt - 1 g
Breton dough is a frequent participant in mousse desserts, so we could not pass it up as part of our school ““. In fact - this shortbread dough with baking powder. A kind of hybrid of biscuit and sand. At the exit we get quite lush and air dough, but at the same time, it habitually crunches and crumbles.
If you want to make white dough in another recipe, just replace cocoa with flour.

To start, beat the yolk (1 pc) with powdered sugar (40 g) into a fluffy snow-white foam. To do this, set the maximum speed of the mixer and beat for 3-5 minutes.
Sift all dry ingredients: flour (45 g), cocoa (12 g), baking powder (3.5 g) and salt (1 g). Mix again with a mixer. Get a big crumb.
Add soft butter (50 g).

Mix until smooth and get a fairly sticky and soft dough.

Roll it into a ball.
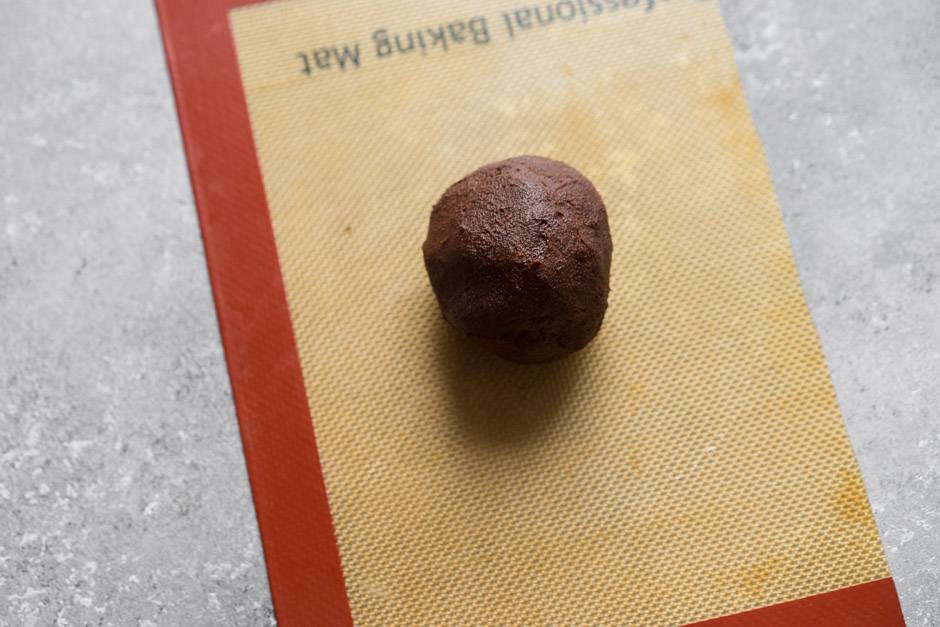
Lay between two sheets of silicone mat (or parchment) and flatten with a cutting board to a thickness of 3-4mm. There is no point in tormenting yourself with a rolling pin, the dough is soft, warm and diverges well. The main thing is to press evenly so that the workpiece remains round. The diameter will be about 16-18 cm.


Place the workpiece (also between the sheets) in an oven preheated to 180 degrees. Bake for 10-15 minutes. Until ready. When you take out the dough, it will still be a little soft, remove a sheet of silicone (parchment) and immediately cut out a workpiece with a diameter of 14 cm (with a ring or a stencil knife).

The dough can be stored in the refrigerator in a film, in the form of a flat pancake, up to four days.
orange cream
- Orange juice - 50 g
- orange peel
- Cream 33% - 90 g
- White chocolate - 150 g
- Gelatin Ewald - 3 g
This layer will be the semantic binder for the entire cake. It can be said that the cremeux acts as a transitional texture from the dense Breton sabre and cherry compote to a gentle and airy mousse. And besides, orange notes in chocolate cake will play well on a par with cherries.

Grate the orange zest and squeeze the juice (50 g), add them to a small saucepan.

Then add heavy cream (90 g) and put the saucepan on the stove. Bring the mass to a boil.

Meanwhile, soak the gelatin sheets (3 g) in ice water. BUT White chocolate(150 g) pour into a glass.

When the creamy mass is heated, pour it over the chocolate. It should start to melt.

Immediately add the squeezed gelatin and stir the mass. Then blend with a blender until smooth.

Pour the cream over the already ice compote filling. You can strain the zest if you like.

Put the workpiece back into the freezer.
Chocolate muss
- Cream 33% - 220 g
- Milk 3.5% - 120 g
- Dark chocolate - 150 g
- Yolks - 60 g
- Sugar - 40 g
- Gelatin Ewald - 7 g
This mousse will be very rich in taste because we use enough dark chocolate and do not resort to a lot of additives. Here we have a base of whipped cream, English cream (anglaise) and chocolate.
If you decide to change the recipe, you can replace dark chocolate on white or milk, but the amount of gelatin will have to be increased, since cocoa butter in chocolate acts here as a stabilizer of the entire mass.

First, let's prepare the English cream. Combine the yolks (60 g) and sugar (40 g) in a bowl and stir with a whisk. Put milk (120 g) on the stove.

Put chocolate (150 g) into a glass. Soak sheet gelatin (7 g) in ice water.

Whip cream (220 g) to soft peaks and refrigerate. A narrow glass is much more convenient for this than a wide bowl.

When the milk is heated to 50-70 degrees, pour some of it over the yolk mixture, stirring it with a whisk. We heat the yolks so that they do not curl.

Pour the milk-yolk mixture into the saucepan with milk and stir again with a whisk.

Return to medium heat and simmer, stirring constantly with a spatula, until slightly thickened. A finger print should remain on the shoulder blade (weight 80-82 degrees).

Remove the cream from the stove, squeeze out the gelatin and combine them with a spatula.

Pour immediately over dark chocolate.

When the chocolate is melted, punch the mass with a blender. The workpiece will be very shiny and smooth. Let it cool down to 30-32 degrees. Cold will help here. water bath. The main thing is to stir the mass with a spatula so that the chocolate does not thicken completely on the walls of the glass.


The idea is to make a hole in the cake where our future berry will fit. To do this, the diameter of the insert mold should slightly exceed the diameter of the peach mold.

Cut off the form with scissors, the height of the side is 6-8 mm.

The mass of chocolate has cooled down and we combine it with cream in several stages. We do everything only with a spatula and very carefully, we save every movement of the spatula in order to preserve the volume of the mousse.
Try to pour the mass on the surface of the cream, and not on the bottom of the bowl.
After each addition of a part of the chocolate mass, do not expect uniformity. Marble suits us, add the next portion.

The mousse should remain airy and fairly persistent.

Prepare the Breton crust and also be ready to take the filling out of the ring.
Assembly
Place the cutout on the bottom of the Eclipse mold with the bottom up. We understand that the mousse will envelop it around and remain in the cake indentation. You can use this technique on any mousse pastries and cakes using any silicone parts.

Transfer the mousse to a bag.

Since the mousse is thick, we will help it disperse in shape and around the workpiece. My Eclipse mold is closed, because I make the workpiece in a 14 cm ring and I can insert it through the inlet. If you have a 16 cm filling, you will first have to put it in the mousse, and then close the Eclipse with the second part.

When the mousse-shaped insert is fitted, pour more mousse on top (you should have about 2/3 mousse in total.

Use a teaspoon to spread the mousse over the clear part of the mold. The mousse is thick, the filling goes in tightly and the mousse needs to be helped to fill the walls with itself so that the outside of the cake is smooth.
Then insert the filling disk so that the compote is on top. Dip the filling into the mousse. Most likely, the filling will fall exactly on the silicone blank-insert.

Pour out the rest of the mousse.

Place the Breton cake on top and press it a little into the mousse, swirling it in a circle. Usually, cakes protrude 1-1.5 mm above the mousse.


Remove the workpiece until completely frozen in the freezer. Approximately 5-6 hours.
Decor "Cherry"
For the icing on the cake, we need to fill the fruit mold from Silikomart to about 1/2 or 2/3 of the height. For this, 1/10 of the mousse that you prepared for the cake is well suited, just put 4-5 grams of gelatin. The decor is small and will soften quickly in the heat on the table - so it is always made with more gelatin.

In total, it took me an hour to prepare it. And the refrigerator will do the rest for you :-)
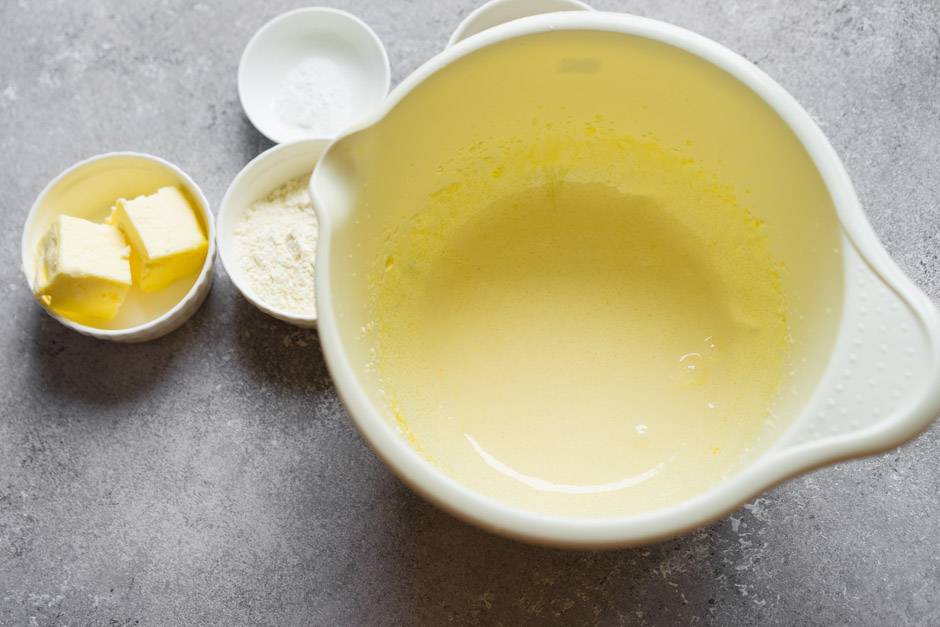
To prepare the mousse cake, prepare the ingredients according to the list.
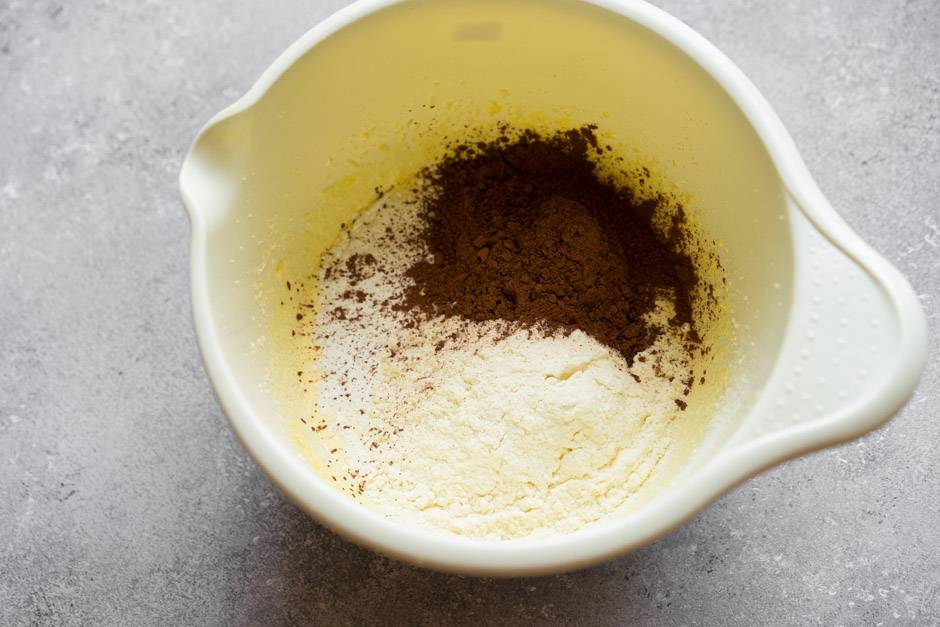
Let's cook first biscuit dough. To do this, beat the eggs with sugar in a lush cream. Beat for about 5-7 minutes.

In a separate bowl, mix cocoa and flour. Then we proceed as follows: add 3-4 tablespoons of the mixture to eggs beaten with sugar, mix well with a whisk. We don’t play too hard, but don’t be gentle either :-) Next, in 2-3 doses, add the remaining mixture, mixing the dough from the bottom up. I also do this with a whisk.

Pour the resulting dough into a mold (18 cm). I will tell you how I bake biscuits. It is this form with a removable bottom. That is, the bottom is removed, and the ring itself is not detachable. I do not grease this form with anything and do not line it with parchment. If you are not sure about your form, then it is better to cover it with parchment. We do not lubricate the walls of the form with anything !!! On them, the biscuit "climbs and clings, rising up."
We bake a biscuit in an oven preheated to 180 degrees for 30-40 minutes. Focus on your oven! A dry beam test is a must!
P.S. See the bright spot on the test? It's just light from a window.

As soon as the biscuit is taken out of the oven, we turn the form over into glasses (mugs, cups, bowls, bowls ...), as shown in the photo. So the biscuit will definitely not fall off. Cool completely like this!
In fact, if the biscuit is baked well, the torch is dry, its surface springs when pressed by hand, then there is no need to turn it over. Just let it cool slightly in the tin, then remove and cool completely on a wire rack.
I did not let this biscuit "rest". I just let it cool completely and cut it right away.

While the cake is cooling, prepare the mousse. We will prepare the products according to the list.
P.S. We only need the yolks, you can freeze the whites by placing them in Plastic container, and then, when necessary, defrost and use as directed.

Pour gelatin with water (room temperature), stir, set aside. He should swell. Read the package leaflet!

Grind the yolks with 20 gr. sugar (we will take it from the total amount indicated in the ingredients).
Mix the second half of sugar with milk and put on gas. Bring almost to a boil (but do not boil!) to dissolve the sugar.

Pour most of the milk with sugar in a thin stream with the yolks grated with sugar, mixing well with a whisk. This is how the mixture will turn out.

Next, return the resulting milk-egg mixture back to the bowl with milk, put on gas and, stirring constantly, bring the mixture to a slight thickening. Be careful not to overheat or the yolks will curdle! If there is a thermometer, then the temperature of the mixture should be about 83 degrees.

Remove the mixture from the stove, let it cool for just a minute, stirring constantly. Then add chocolate and gelatin, which has already swelled. Mix well. The temperature of the egg-yolk mixture is enough for the gelatin to dissolve and the chocolate to dissolve.

This is how the mixture will turn out. Let it cool to room temperature, stirring constantly with a whisk so that a crust does not form.

Have you cooled down the mixture? Whip the cream to soft peaks. Don't beat it or you'll get oil!!!

Add a couple of tablespoons of whipped cream to the gelatin mixture that has cooled to room temperature, mix quite intensively with a whisk. Then, in several stages, we introduce the remaining whipped cream.

We get such a magnificent mixture.

Biscuit cut into two parts. We cut off one part of the biscuit - the lower one, slightly reducing it in diameter (so that it is less than 18 cm - the diameter of the mold). We do not need the upper part of the biscuit. It can be put in a plastic bag and frozen, and then, when necessary, defrost and make another cake.
By and large, you can not cut the biscuit, but then the cut will not be so "spectacular".
We make sides from parchment, fix it, for example, with a clothespin or a paper clip. We do this so that the parchment does not "move out". If you have confectionery wrap, use that so the sides don't look "wrinkled" when the wrap is removed, which happened to me.
Laying out the biscuit...

And fill it with mousse. Put in the refrigerator for at least 4 hours. And even better - at night.
Anticipating questions like "And my biscuit has surfaced. Why???", I will answer: "Nothing has surfaced for me. Why it happened to you - I don’t know!"

In the morning I took the mousse cake out of the fridge, peeled off the parchment, dusted it with powdered sugar and garnished with fresh strawberries and mint leaves.

And here is such a mousse cake in a section. Happy tea!
mousse cake with a mirror glaze, prepared according to this recipe, it turns out to be tender and very light in taste. The dessert consists of three layers of contrasting color. The basis of the cake is a thin, richly soaked chocolate biscuit. This is followed by a neutral white layer consisting of cream and curd cheese. And the “composition” is completed by an elegant and brightest blueberry mousse.
As a final touch, the three-color layers are filled with a shiny and beautiful glaze, so that the dessert does not even require additional decor - the cake becomes spectacular due to the even and reflective surface. Strictly, concisely and tastefully! We are sure you will be satisfied with the result! So, we carefully study the technology and prepare a mousse cake according to the recipe with step by step photos.
Ingredients: 
For the biscuit:
- eggs - 2 pcs.;
- flour - 50 g;
- cocoa powder - 10 g;
- sugar - 80 g;
- baking powder dough - 1/3 teaspoon.
For impregnation:
- drinking water - 40 ml;
- sugar - 40 g;
- cognac or any liquor (optional) - 1-2 teaspoons.
For creamy mousse:
- cream (33-35%) - 250 ml;
- cream cheese(curd, without additives) - 190 g;
- sugar - 3 tbsp. spoons;
- vanilla sugar - 8 g;
- gelatin powder - 6 g.
For blueberry mousse:
- blueberries (frozen is suitable) - 400 g;
- cream (33-35%) - 250 ml;
- sugar - 100 g;
- gelatin powder - 8 g.
For mirror glaze:
- dark chocolate - 40 g;
- cocoa powder - 60 g;
- drinking water - 100 ml;
- sugar - 190 g;
- cream (from 30%) - 60 ml;
- gelatin powder - 9 g.
- The first layer of our mousse cake with mirror glaze will be a biscuit. To make it, beat the eggs together with sugar until the sugar grains are thoroughly dissolved and the volume of the mass increases.

- Separately combine the remaining components: flour, cocoa and baking powder. After sifting, gradually introduce the dry mixture to the beaten eggs, carefully stirring the composition with movements from the bottom up. We strive to obtain a completely homogeneous and evenly colored dough in a chocolate shade.

- We will bake a biscuit and later form a cake in a detachable form with a diameter of 22 cm. For convenience, cover the bottom with parchment, rub the walls a little butter and then put the prepared biscuit dough into the mold. Distribute the mass in an even layer.

- We bake a biscuit in an oven preheated to 200 degrees for about 15-20 minutes (until a dry match). The cake for a mousse cake with a mirror glaze should be thin (no more than 1 cm high) and even, without a convex top. If necessary, carefully cut off the excess part with a knife.

- We wash the detachable form in which the biscuit was prepared and wipe it dry. We lay the walls of the container with parchment paper. At the bottom we place completely cooled biscuit cake. For impregnation, pour sugar with boiling water, mix until the grains dissolve. We cool the sweet liquid and combine with cognac, soak the pastries.

How to make a creamy layer for mirror glaze mousse cake
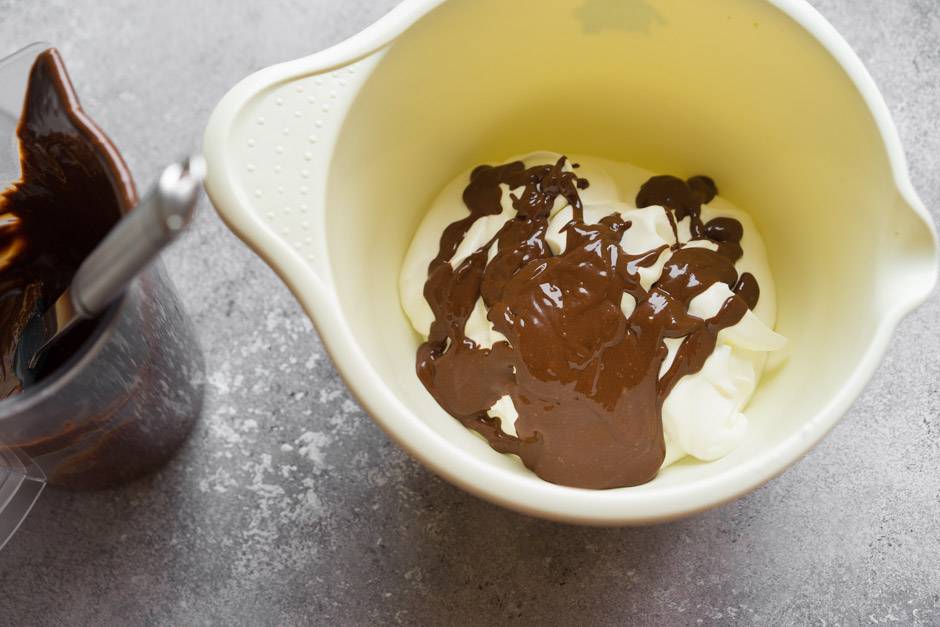
- Now we are preparing the creamy mousse for the cake. Classic cream cheese (without any additives) is kept at room temperature to soften, and then mix with 2 tablespoons of sugar. Beat the mass until fluffy and the sugar is dissolved.

- In a separate bowl, beat the heavily chilled cream with vanilla sugar and 1 tbsp. regular spoon. As soon as the creamy mass thickens, mix it with cheese. We work with a mixer for literally another 10-20 seconds, combining the components into a homogeneous cream.

- Soak gelatin in 50 ml of pre-boiled cold water. Leave to swell for the time indicated by the manufacturer on the package.

- We heat the swollen mass in any convenient way (the main thing is not to boil!). You can use the water bath microwave oven or simply place the container of gelatin in a larger bowl filled with hot water. Actively stirring, we achieve complete dissolution of the powder.

- After cooling slightly, pour the gelatin mass in a thin stream into butter cream, intensively and continuously stirring the mousse with a spoon or with a mixer. Pour the mixture onto the biscuit cake, level the surface and put the two-layer blank in the refrigerator for 3-4 hours (until the light mousse has completely solidified).

How to make a blueberry layer for mirror glaze mousse cake
- When the creamy mousse hardens, prepare the third layer of the cake. All blueberries, after defrosting, puree with an immersion blender.

- The resulting berry mass is carefully ground through a fine sieve. We will use the liquid part to make mousse. The cake remaining on the sieve is not useful for the recipe (you can then cook compote from this mass).

- Whip the cold cream with sugar until firm.
- Add blueberry juice, beat until the cream is evenly colored.

- Dissolve gelatin in 60 ml of cold, boiled water. Next, proceed as in the case of creamy mousse- let the mass swell, warm it up. We introduce the gelatin composition into the cream with continuous whipping. Pour the blueberry mousse into a mold with a biscuit and creamy mass, level it and put it in the refrigerator until the final layer solidifies.

How to make mirror glaze for mousse cake
- For gelatin glaze, pour 75 ml of water. Pour the sugar into a small saucepan, add the sifted cocoa powder.

- Pour cream and 100 ml of water into the dry mixture. Stirring all the time, bring the glaze to a boil and remove from the stove. Immediately add the chocolate slices, actively stirring the mass and achieving complete dissolution of the chocolate clots.

- The swollen gelatin is heated until dissolved and introduced into chocolate icing, mix. We filter the mass through a fine sieve, cool.

- From the frozen and cooled mousse cake, remove the detachable side of the mold, carefully separate the parchment.

- To make it more convenient to apply the icing, put our dessert on a wire rack, substitute a large plate from below. Fully covered with mirror chocolate mass cake. The rest of the icing that has drained onto a plate can be collected, strained and, if necessary, pour over the cake again, or simply transferred to a convenient container, put in the refrigerator and later used to cover other desserts.

- We shift the mousse cake with mirror glaze to a plate, put it in the refrigerator. As soon as the glossy surface hardens, you can serve dessert to the table.

In the context of a three-color mousse cake with a mirror glaze looks very impressive! Bon appetit!


