The most colorful and long-awaited treat on the holiday table has always been cake! But its small, delicious cousins, cupcakes, have pushed the huge pastries into the background. These cute cupcakes in a corrugated paper wrapper are just begging for a bite! They look solemn and unusual. Such sweets are simply necessary for the holiday table. In addition, delicious cupcakes can be presented as a small gift. for cupcakes? Very simple!
Mini cake
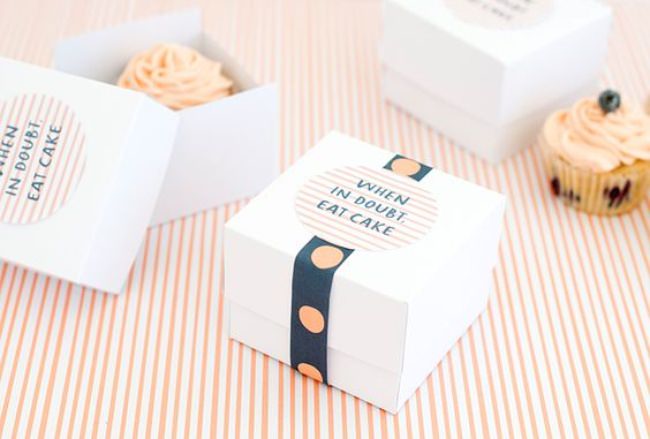
Small cakes in bright corrugated wrappers are now on the menu of any celebration. These taste like ordinary cupcakes, but their shell is simply gorgeous. Bright glaze, cream, cream, edible beads, flowers, butterflies, rhinestones - all this can be used to decorate cupcakes to your liking. It is fashionable to decorate weddings and children's birthdays with a candy bar. This is a separate table on which all the sweets are located. Children usually do not leave this wonderful place even a single step! A cupcake box is indispensable at a party, because kids will want to take treats home.
People really loved these little cakes. They appeared at the beginning of the nineteenth century in America. These “babies” were baked in ordinary tea mugs. This is where the name - Cupcake - came from. Over time, the process became simpler and special forms appeared.
Theme of the day
Nowadays, not simple, but themed parties are relevant. Everything on this day is subordinated to one style: room decor, outfits, menu, entertainment. The cupcake box should also match the theme of the celebration, so you can make it yourself.
Cupcakes are prepared not only for home celebrations. Usually they are taken with them on a visit, on a picnic, or any outdoor events. But how to deliver them in their original form? After all, a cap made of cream or cream will instantly spoil if you put the cakes in a regular box. You need a box for cupcakes in which you can transport them without problems.
Work is in full swing
Making a box is not that difficult. You will need thick paper, scissors and glue. The size depends on the number of cakes. Each of them will be inserted into a separate cell. Carefully cut out the parts of the box according to the diagram. Then bend along the fold lines and coat the valves with glue. This will ensure that your cupcake box is durable. To prevent the cakes from traveling inside your cardboard masterpiece, you need a backing. From thick cardboard, cut out a rectangle one millimeter smaller than the bottom of the box. Now cut holes in it slightly larger than the diameter of the cupcake. Place the base on the bottom and you are ready to place the cakes!
Now they are tightly fixed inside and will not deteriorate during transportation.

As easy as pie
You still don’t know how to make a cupcake box with your own hands quickly? The simplest option is two volumetric rectangles. Prepare two sheets of thick paper or thin cardboard. Make cuts on four sides, measuring in advance with a ruler. Now fold the resulting strips inward and glue them. The lid must be one centimeter larger than the base, otherwise it will not close the box. Boxes of bright colors, lid and base of different shades look interesting. But a white classic box is a win-win option for any celebration! The paper can be corrugated, glossy, and most importantly, thick.

Decor
If you have an excellent box for cupcakes, made with your own hands, then you can start decorating. For a children's event, images of cartoon characters, bows, and ribbons are suitable. Carefully glue the photo with stationery glue and let it dry.
For a wedding ceremony, boxes can be decorated with flowers, even fresh ones. The finished boxes are tied with a red ribbon, symbolizing love. The traditional option is a pink and blue ribbon, doves, a pair of rings. Boxes with images of the bride and groom look good: they can be distributed to guests while the newlyweds are walking around the sights of the city!

Small pleasures
Please and surprise your loved ones. Prepare cakes and colorful boxes for them for the upcoming holiday. Guests will be delighted with such a treat. You can make personalized boxes, and then the guests will be doubly pleased. This will show your gratitude for their congratulations and warm wishes. When friends start leaving, give them sweets in a box. In the morning, they will be happy to take out your work and drink coffee and cake.
On the eve of the New Year holidays, store windows are full of gift boxes, decorative bags, and wrapping paper for every taste. Smiling sellers helpfully offer to provide wrapping services for New Year's gifts. And all this seems great, because you must admit, it’s much nicer to receive a New Year’s trinket in a beautiful package. But on the other hand, the whole meaning of the gift is lost, the very gift that should be intended specifically for you.
The recipient of the gift will be doubly pleased if, in addition to choosing the gift, you spend a little more time on wrapping it. In this article we will teach you how to make gift boxes from paper or cardboard with your own hands. This is not at all difficult to do, because all the crafts presented with us are accompanied by ready-made diagrams, templates and step-by-step master classes. All you have to do is choose the appropriate box option, print out the diagram and glue the paper box together according to the instructions. By the way, some of the boxes we present are made using the origami technique, which means that you don’t even need glue!
So, before we get started, let's check if everything is ready. To make a paper gift box with your own hands, you will need: beautiful wrapping paper (you can get by with plain white paper and then decorate it), scissors, pencil, ruler, glue or double-sided tape, and a stationery knife. Everything is? Well then, let's create!
#1 Box “Herringbone”
A great way to pack a small trinket for friends or family is this New Year's themed box. By the way, it’s very easy to do. You'll need green paper and hole punchers (although you can do without). Well, any rhinestones, beads, sequins are suitable for decoration, in general, to your taste!
#2 Gift box “Mint Candy”
And here is another original version of a gift box, which you can very easily make with your own hands, especially with our step-by-step master class. You will need red construction paper (for the box itself), as well as white paper for decoration. You can make the upper part of the box with applique or simply color the white sheet with pencils or felt-tip pens. By the way, there doesn’t have to be a lollipop on top. You can get creative with a New Year's theme and decorate the box on top, for example, with a snowflake, a Christmas ball or red angry M&M's.

#3 Box with lid (diagram)
Well, if you don’t have the time or desire to tinker with the box for a long time, you can use a simple ready-made template. You need to download it, print it, cut it and glue it. Voila, the box is ready! Please note that we have prepared 2 diagrams for you: square (size 5x5) and rectangular (size 7x6x4).

#4 Cup with a gift
But here is a gift packaging option for those who want to surprise with originality - a gift box-cup. It's quite simple to do, but looks impressive! To create, you will need thick paper, scissors and glue. And of course our step-by-step instructions!
#5 New Year's box “Cake”
If the New Year's party is planned in a large company, for example with a large family, it makes sense to pack gifts for everyone in one large multi-pack box. The cake packaging box consists of 8-10 pieces, each of which is a separate paper gift box.

#6 Gift box with lid for muffins and other small items
During the New Year holidays, edible gifts are quite common: various sweets and baked goods. An original gift will be a muffin prepared with your own hands in a designer gift box.
#7 New Year's box “Diamond”
You can pack a New Year's gift in a diamond-shaped gift box. With our scheme, making such intricate packaging will not be difficult. All you have to do is print out the box template, cut it out and glue it according to the instructions. It's simple!

#8 New Year's packaging "Santa"
A very cute New Year's package will be made from a regular paper bag, decorated with a paper Santa. Download the Santa pattern, cut it out and glue it onto the bag. DIY Christmas packaging is ready!

#9 Boxes “Harry Potter”
Fans of stories about Harry Potter will be indescribably delighted when they receive a piece of their favorite hero as a gift. By the way, such a box with magic sweet beans can be a wonderful addition to a set of books about the adventures of a young wizard.

#10 Box “Gingerbread House”
The symbol of the Christmas and New Year holidays, well known to everyone from Hollywood films, is the gingerbread man. You can make a paper box in the shape of a gingerbread man's house. By the way, putting the gingerbread men themselves in such a house will be very symbolic, but if you also make them with your own hands, there is no price for such a gift at all! The “Gingerbread House” box is made according to a special pattern, which you can download below. Also below is a master class on making a box with your own hands.
New Year's time is coming - a time of miracles, when everyone can feel like a little helper...
#11 Box “Heart of four parts”
A cute package consisting of four boxes can be made using our pattern. Giving your loved one not one, but four New Year's gifts at once is a true manifestation of love. You can download the diagram with four boxes and the base for them below.

#12 Box made using origami technique
To make such a gift box you will not need a diagram or template. To make a paper box with a lid, you only need a sheet of paper. The main condition is that the sheet must be square. Strictly follow the instructions of the master class and in 10 minutes you will have the cutest origami gift box made by yourself.

#13 And another option for an origami box
This box is very similar in appearance to the previous one, but the manufacturing method is slightly different. To make this box you will need scissors, but you don’t need a diagram: just a square sheet of paper. Follow the instructions of the master class and you will succeed!

#14 Box using origami technique “Volume Triangle”
If you want to get confused and ready-made templates are not for you, then be sure to pay attention to this complex and very impressive gift box. You will need paper and patience. Well, then follow the instructions and everything will work out!
If you like to make gift boxes without templates, glue and scissors, but only with the help of the correct folds of paper, then you will appreciate this box.
#16 Closing box using origami technique
Well, another version of the box using the origami technique. It's quite easy to do, especially if you follow the instructions. By the way, the steps of making the box are described below in the photo instructions.
#17 Box “Cupcake”
An original gift packaging for a New Year's gift will be a box in the shape of a cupcake. It looks very impressive, but it will take a little work to create. In general, there is nothing complicated in creating this box; you just need patience and imagination! See the step-by-step master class below.

#18 And another "Cupcake"
And here is another variation on the theme of a gift box in the form of a cupcake. The manufacturing scheme is very similar to the previous one, but you might like it!
#19 Gift box for cookies
A ready-made diagram for making a cardboard box with your own hands. All you need is to use our ready-made diagram, which you need to print, cut out of cardboard, and then glue it together in accordance with the master class.

#20 Chinese style gift box
You can put anything you want in this handmade box. And most importantly, it is done quickly and simply. You can download the box diagram from the link below.
Download the diagram

#21 Gift box in the shape of a cup

Truly original packaged gifts are valued much more than gifts in a regular gift bag. Pay special attention to this charming paper box, which you can make with your own hands using our pattern.
How to make a cup

How to make a lid

#22 Box “New Year's Sweater”
This beautiful gift box can be made with your own hands. To do this you will need a diagram, which you can download on our website, scissors, glue and a little patience.

#23 Box with bow closure
Quite simple to make, but very original gift box. You will need a square sheet of wrapping paper, glue and instructions from the master class. 15 minutes - and your gift box is ready!

It’s very easy to make a cardboard box for a New Year’s gift, but for this you will need not only cardboard, but also scissors (a stationery knife) and glue or double-sided tape (for secure fixation). Below is a step-by-step manufacturing master class, following which you can quickly and easily make a cardboard box with your own hands.

If you want to give a delicious gift in the form of cupcakes or muffins, then a paper egg tray would be the ideal packaging for such a gift. Cut the required number of compartments, decorate the top of the box with decorative elements, tie with a ribbon and Voila! The gift is ready!

You may be interested in:
#26 Original box “Milk package”
Another incredibly cool New Year's box that will amaze anyone. You can pack a simple trinket in such an unusual box. It’s quite simple to make it if you use a ready-made diagram, which you can download on our website.

#27 Box with lid
Using our simple pattern, you can easily make a gift box with a paper lid with your own hands in just a few minutes. You can put anything in such a box as a gift: from a cute trinket to handmade sweets. You can download the box diagram below.

#28 Packaging box with flower clasp
A simple design for a cute packaging box with a flower clasp. Fast, beautiful, original. Please your loved ones with a handmade gift. You can download the finished diagram from the link below.

#29 Gift box “Petals”
You can make a wonderful box for a New Year's gift with a petal-shaped lid with your own hands. In fact, making such a charm not only won’t take much time, but will also delight you with its cutest quality.
#30 Gift box for New Year's cupcake
You can make a very cute cardboard box with your own hands. It will turn out no worse than store bought. You can make a special bottom for the cake in the box. By placing your little delicious gift in a special stand, you don’t have to worry that all the cream will remain on the box. To make such a cardboard box with your own hands, you need to print the template and follow the instructions of the master class.

#31 Gift box for children “Ice cream”
A New Year's gift should be packed not just well, but with taste. In the “Ice Cream” gift box, your gift will be appreciated! With our scheme, making a delicious box will only bring pleasure!

#32 Packaging box “Candy”
Another option for “delicious” packaging would be a candy-shaped box. To create a New Year's atmosphere, the packaging can be slightly enlivened by adding eyes and a mouth. Download the diagram, print it and glue the box in the right places.

#33 Gift box “Cheerful Bunny”
You always want to give a special gift to your dear and close people. And it’s best when this gift is not only special, but also in special packaging that emphasizes the significance of a particular person. Making such a paper box with your own hands is not difficult if you download the diagram from the link below.
Download the diagram

#35 Box “Funny Frog”
Another very cheerful and positive box for New Year's gifts is “Cheerful Frog”. It’s done quickly and gives a lot of emotions! Download the diagram and please your loved ones with a merry New Year's box.

#36 Box with a face
You can also pack a gift in an original way in a box made of plain white paper, adding some details on it in the form of eyes and a mouth, thus bringing the gift to life. With our ready-made diagram, making such a box is not at all difficult. Just download the diagram, print and glue.

#37 Gift box “Birdhouse”
Let's start with perhaps the most unusual paper gift box. Making such a birdhouse is quite simple when you have a ready-made diagram. The diagram needs to be printed, transferred to suitable paper, cut out and glued in certain places. Complex and intricate at first glance, DIY boxes will be ready in 10-15 minutes. 
#38 Box “Apple”
A gift in a paper box in the shape of an apple will be original. With such a box, choosing a gift is quite easy - gelatin worms will come in handy. Making such a box with your own hands with the appropriate diagram is very simple; the manufacturing process will take no more than 10 minutes!

#39 Box “Christmas wreath”
There is no limit to your originality, we just give you direction, and then you create on your own. You can come up with a lot of boxes for the New Year theme, for example, in the form of a Christmas wreath. Very symbolic!
Well, what would a real New Year be without the Nutcracker and music from the famous ballet by P.I. Tchaikovsky? A great gift would be a bag of nuts with a nutcracker tag attached. You can draw the fairytale hero yourself, but if you have no inclination to draw, you can find an image of the Nutcracker on the Internet and print it, then cut it out and attach it to the bag.

Usually the next step is what to wrap it in. That is why we have collected a lot of options on how to make packaging for cakes, cookies, pies and muffins with your own hands.
Save this article, it will be useful to you more than once. For example, when you decide to bake something delicious in d, or.
How to pack a piece of cake or pie: packaging diagram
The situation is familiar: there is a cake or pie, and in some magical way it needs to be transported piece by piece to another place. Yes, so that the baked goods do not turn into puree.
It turns out that this problem was solved a long time ago. Simply print out the diagram for the pie box and use it to cut out a piece of cardboard. The diagram is below (dotted line - bend, solid line - cut).
Scheme of a box for packaging a pie or cake in pieces

How to pack cookies: packaging ideas
If we are talking about packaging large flat cookies, then you can simply use the “envelope” technique. Take a square sheet of paper or cardboard and simply fold the corners towards the center, securing with tape.

The second option on how you can pack cookies with your own hands in a stylish and elegant way is to sew a suitable case from cardboard or paper. And although the picture shows cookies packed in newspaper, you should not follow this example - printing ink that is transferred to food does not have the best effect on children's health.
For packaging, choose clean, unbleached paper. You can use thick napkins or baking parchment. Cut out the cover of the required shape, stitch it along the edges using a sewing machine or manually using one of the decorative seams.

If you need to quickly and beautifully pack cookies for a school fair or as a gift, use regular paper bags. You don’t have to buy them; it’s quite possible to make such bags from craft paper or baking parchment.

A diagram of how to make a paper bag for packaging cookies with your own hands.

To avoid crumbling, we suggest packing small, fragile cookies in boxes made of paper cups. To do this, cut off the thick rim of the cups and make eight vertical cuts, as shown in the figure. Then place the cookies inside and fold the “petals” one by one.

How to pack your own muffins and cupcakes
Small muffins can be packed in cardboard egg trays. Stick something fun on top so you can't see the "Eggs" sign, and you've got yourself a stylish muffin container.
You can also use plastic cups to pack muffins. Either place them as you see in the picture, or, if you have cups with a lid, place the cupcake on the lid, and cover the top of the cupcake with the glass itself, like a dome.


If you are faced with the task of delivering a classic-shaped cupcake from point A to point B, we suggest making a cardboard box with your own hands. You will see the diagram below. The main thing is that the glue you will use to glue the box does not come into contact with the baked goods: either replace it with paper clips/thread/glue away from the edges, or make a liner inside the box from tissue paper.
But if you decide to bring pre-cut pieces of cake to the school fair, use these cookie packaging ideas.


Packaging for other products: jelly, popcorn, chips, fruits
If you decide to bring popcorn (unseasoned popcorn is okay for kids - it's just corn), homemade vegetable chips, fruit or jellies, we offer the following packaging options.
Paper or plastic containers, rolled and paper cones, skewers and ice cream sticks to string pieces of fruit onto and make it easy for your child to eat.


How to beautifully pack sandwiches for a school fair
Yes, yes, sandwiches are quite suitable for a school fair. The main thing is that they are fresh and made from quality products. But you can pack them beautifully in two ways: put them in paper bags like the cookie bags we talked about above. Or just wrap it in paper tape and tie it with a rope.


Now you know how to pack cakes, pies, muffins, cookies, fruits and jellies to get them safely to the school fair. Share your baking and food packaging lifehacks in the comments or send us an email to editorial@site
When an important special event is coming up, we usually strive to order the necessary decor, services, and desserts from professionals. What if there is an important event coming up, festive, but in a less solemn format? Can you then afford to save a little and do some of the preparations yourself? This year I ran out of ideas on what to treat the children at school on the occasion of Elder’s birthday, and I seriously thought about... I can’t say that my first experience was particularly successful - it turned out well, but far from good. After that, I made cupcakes at home twice more, trying to understand how to solve certain problems and cope with difficulties, and I decided to combine my personal experience into this short article with tips. Read it, it can really be useful if you, like me some time ago, have never had experience with these mini-cakes before, but are also thinking about it.

1. Basic recipe
The base of the cupcake is an ordinary muffin or cupcake, so there should be no difficulties: just choose a recipe that has never let you down, bake and proceed to further work.
By the way, please note that decorating cupcakes (with a relatively flat top) will be much easier than muffins (which usually have a “roof” that flies upward). This fact in no way limits you in choosing a base recipe, however, it is worth considering
that moment, soberly assessing his abilities in decorating cupcakes.
2. Cupcake filling
This is not a mandatory item in the program, but it is very interesting and elegant - if something small, but very tasty and original is hidden inside your cupcake, the cupcake will immediately become several points cooler and more unusual.
Preserved cherry, a piece of dried plum, a caramelized apple slice, a nut, a piece of caramel, a chocolate slice, raisins or dried apricots, cranberries or lingonberries, dried pear or melon, peanut butter, jam, marmalade, mashmallows, poppy seed filling - there are a lot of options! Choose an affordable one and don’t forget that the filling is not the cupcake itself, and there shouldn’t be too much of it.
3. How to make a topper
The cream “cap” that decorates the cupcakes is perhaps the most important thing about these funny cakes. In this matter, there are two stones that you can stumble over: the first is the choice of cream, the second is its careful and effective application.
The main condition for cupcake cream is its stability: you need to understand that during transportation it can leak, get confused, fall, wrinkle, and 10-15 other verbs that obviously won’t lift your spirits. To prevent such blunders and disgraces, choose a recipe in which you are 101% confident. If you don’t have such a recipe in your arsenal, don’t rush to make cupcakes for others - first practice baking for yourself and your family, find your signature cream that doesn’t let you down, and then take a risk and prepare cupcakes for holidays and fairs.
The second point is beauty and accuracy. Without experience, it is quite difficult to make a beautiful “hat” that will not only be tasty, but also attractive. Practice on cakes, try decorating Easter cakes, decorate pies and rolls. Once you've filled your hand, move on to the cupcakes.
4. How to decorate cupcakes
A beautifully layered cupcake cream is half the battle. It will certainly be incredibly solemn and festive, but this is not enough to say that your cupcakes are perfection. They lack a “zest” - and this very “zest” can be anything - from fresh berries and beautifully cut fruits to small multi-colored sweets, candied fruits, and cookies. Chocolate drops, lemon or orange zest, sugar decor, preserved fruits, chocolate figures, wafer rolls, mastic decorations - there are many options, choose to suit your taste.
And don't forget that the golden mean is always beautiful: by generously sprinkling the cupcakes with raisins, you may get beautiful cupcakes, but the essence of the cupcakes will be lost. Decorating is not camouflaging, so be smart and try not to overdo it.
5. How to make a cupcake box
Cupcakes, of course, can be prepared for home parties, however, most often these mini-cakes are made to take with you - on a visit, to school, to work, to one or another outdoor event. And here the main problem arises - how to deliver cupcakes so that they do not lose their attractiveness and spectacular appearance. You won’t be able to hold 10-20 cupcakes in your hands at once, and if you simply put them in rows in any box you find, the cupcakes will begin to “travel” back and forth around the box and will definitely ruin their “hair.”
Of course, there is a solution, and it was invented a long time ago: ready-made industrial boxes with slots into which cupcakes are inserted for transportation. However, let's be honest: if you don't make cupcakes professionally, most likely you prepare them at the last moment - when the child suddenly remembers before going to bed that tomorrow there will be a fair at school, to which you need to bring homemade cakes. What kind of pre-ordered box is this? Here you have to make something with your own hands!
Arm yourself with cardboard and scissors, construct an ordinary box (by the way, you don’t have to construct it, just take a suitable shoe box), put a “lid” inside, the size of which is slightly smaller than the box itself - just enough to stand firmly inside. And in this very “lid”, make round slits with a diameter slightly larger than the diameter of the base of the cupcake - the cakes will fit firmly into the holes, and you can transport them without much difficulty.


