The use of shellac for coating nails has gained popularity due to the improved characteristics of the coating. To make yourself such a manicure, it is not necessary to visit the salon. The procedure can be carried out at home, but for this you need to purchase special equipment and know the rules for working with the material. How to cover nails with shellac at home is described in this article.
What is Shellac
Shellac is a modern manicure product that was invented by the American company CND in 2010. CND (Creative Nail Design) was engaged in the production of varnishes, manicure tools and nail care products. Shellac was introduced as a unique composition for decorative manicure and quickly gained popularity among women due to its qualities.
Effective, elastic and durable coating is suitable for weakened and brittle nails
Shellac coating is odorless, hypoallergenic, free of formaldehyde and toluene, suitable for thin and brittle nails. At the same time, shellac provides flexibility and strength to the nail plate, improves appearance nails, protects against exposure to household chemicals and mechanical damage. By consistency it is a varnish, but by properties it is a gel, which is dried in a special ultraviolet lamp. Shellac coating is practical because it does not wash off and lasts up to 3 weeks.
Comparison of properties of varnish and shellac (table)
Shellac gives a denser coverage of rich color
What coatings to choose
With the advent of Shellac, consumers began to call any gel polish shellac.
Despite the fact that CND does not consider Shellac a gel polish, users equate them. There is an opinion that Shellac contains the resin of the same name or its derivatives. However, no official source mentions the content of organic shellac polymer in CND products.
- Of course, the leading place among gel polishes is occupied by the American company CND as the inventor of shellac. The quality of Shellac CND coating is different from coatings from other manufacturers. But he has worthy competitors, which are worth paying attention to.
- Gel Polish GELCOLOR by OPI is a gel that dries under LED lamps. OPI does not require pre-buffing nails and claims ultra-fast drying - just 4 minutes for all coats (including base and top coats). Consumers, however, note the liquid consistency of this gel polish and, accordingly, a less saturated color than CND shellac.
- Gel Polish Artistic Color Gloss. To polymerize the gel, you need a special LED lamp Artistic LED PRO 30, in which the hardening process takes only 30 seconds. The manufacturer promises a flexible glossy finish that lasts up to three weeks. This gel polish has a thick consistency, so it is recommended to apply it in thin layers.
- Shellac Blue Sky is another gel polish that is popular, however, users pay attention to the liquid consistency and the need to apply up to three layers for a denser coverage. This coating is dried under a UV lamp.
Examples of the most popular in the photo
The CND palette has 79 basic shades The Gel Color palette has more than 100 colors Gel polishes trademark Artistic Color Gloss Blue Sky offers 250 shades of shellac
What you need to pay attention to before applying
- To avoid misunderstandings, you should pay attention to the fact that the degreasing liquid, base, gel polish and top coat must be from the same manufacturer. It is then that the result will correspond to the declared.
- With a fungal infection of the nails, it is not recommended to apply shellac to avoid exacerbation and spread of the process.
- It is necessary to refrain from applying shellac while taking antibiotics, as the coating will not adhere better.
- To keep shellac for a long time and not fade, you should refuse contact with products containing acetone and household chemicals. To protect the coating, it is recommended to use rubber gloves.
- In the first two days after application, it is not recommended to visit the bath and sauna.
How to apply shellac at home
Working with shellac is just like with regular varnish. But you need to dry it in a UV lamp, because only under the influence of UV waves of a certain length will a transition from a liquid to a solid state occur, and an elastic film forms on the surface of the nail. For the same reason, shellac is packaged in opaque bottles, as it shrinks when exposed to sunlight.
What is needed to perform the technique
- Ultraviolet lamp;
Different types of lamps work with different coatings, and the exposure time for each lamp is individual, so when using a particular model, you must definitely read the instructions. - soft nail file;
- lint-free wipes;
- degreaser CND Scrubfresh;
- Base Coat from CND;
- shellac CND;
- UV top coat from CND;
- CND Cool Blue tack remover or alcohol wipes
- cuticle oil.
Set for work (photo)
 Necessary for working with the cuticle. Grinding the nail plate increases the degree of adhesion to the coating.
  UV lamps can be used at home
  Disinfection and degreasing - milestone when applying shellac
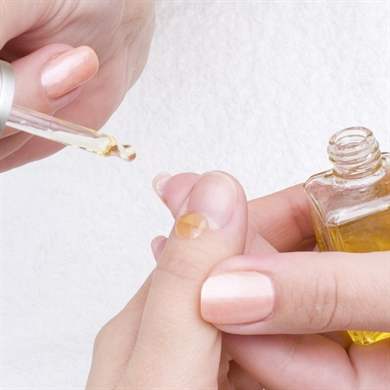
  In the process of drying the layers of shellac, a sticky layer forms on the surface, which is removed with a special tool. After applying the manicure, it is recommended to treat the skin around the nail and the cuticle with a special nourishing oil.
  The top coat will add shine and strength to the manicure.
  A large palette of gel polishes allows you to choose a color for every taste. To obtain a smooth and glossy finish, it is important to completely clean the nail.
  The base gives the coating strength and protects the nails from penetrating staining.
Step-by-step instructions: how to do a manicure and apply Shellac
- Prepare nails: manicure, remove cuticles, shape nails.
- Treat the nail plate with a soft file for polishing, this is necessary for the best adhesion of the coating to the nail.
Grinding is performed against the growth of nails
- Nails need to be disinfected and degreased with a special tool. To save money, you can use pharmacy alcohol wipes.
This tool removes the remnants of cream, soap and other cosmetics from the surface of the nail.
- Cover the nails with the UV Base Coat, while treating the ends of the nail. It strengthens the nail plate and protects against the effects of dyes.
The base must be applied to the entire nail plate and to the end of the nail
- Dry the layer under a UV lamp for 10 seconds.
- Warm the shellac in your hands and apply a thin layer on the nails. Shellac is applied with a brush, like a regular varnish. In this case, the ends of the nails are necessarily sealed.
Each layer of shellac is dried under a UV lamp.
- Dry in a lamp for 2 minutes.
- Apply a second layer, more dense. Too thick a layer can swell, so moderation in application should be observed.
- Dry under the lamp for 2 minutes.
The hardening process of shellac occurs only under the influence of certain UV waves.
- Apply the UV Top Coat in a thick layer, which will give the coating strength and shine.
Top coat increases the life of shellac
- Dry for 3 minutes. The agent hardens under UV rays for 2 minutes.
- Remove the sticky layer from the coating with lint-free wipes and special liquid.
Remove the sticky layer only with lint-free wipes so as not to spoil the gloss of the coating
The procedure takes approximately 30 minutes.
Video instruction for beginners
What problems can be encountered when applying
Even strictly observing the technology, you can not get the perfect result. Consider what problems may arise and how to solve them:
- Coating chips. To prevent this from happening, the obligatory sealing of the ends of the nail with each layer of the coating is required. Peeling nails can also cause chipping. To correct exfoliated areas, a structuring gel is used, which is applied to the nails immediately after the base.
- The coating does not dry and lies unevenly. It should be remembered that it is recommended to apply shellac in thin layers. So they dry faster and give a smooth and shiny coating.
- Loss of shine. If the shine disappeared immediately after applying the top coat, then you can apply another layer of top coat. If the shine has disappeared during wear, then you can update the coating with ordinary varnish, which is applied on top of the shellac.
- Uneven coverage due to the curvature of the nail plate. Shellac lays unevenly on uneven nails. To smooth the surface of the nail, a structuring gel is used.
color mixing
In order to get new shades of shellac, you can use the sequential application of one color to another. In addition, each layer must be dried under the lamp. How to mix shellac colors correctly can be found by watching the video (video).
Video about mixing rules
Options for mixing shellac shade Hot Chilis (photo)
Shellac gets an oblique shade when using Tutti Fruitti for the second layer To get a soft pink shade, apply a second layer of Strawberry Smoothie A hot pink shade will get shellac if you apply a second layer of Rose Bud If you apply dark Fedora on Hot Chilis, you get a burgundy shade
Decor with sequins
To decorate shellac with sequins, you need:
- apply a base on prepared nails and dry under a lamp;
- apply the first layer of shellac and dry it;
- pour a little shellac into the palette, pour glitter into it and mix;
- apply the mixture with a second layer;
- dry;
- apply top;
- remove the sticky layer.
How to paint: step by step video
Glitter manicure designs
 Only one nail can be decorated with sparkles. The unusual shine of silver sparkles on dark varnish attracts attention. All nails are decorated with sparkles, and there are more of them on the tips of the nails.
  The base of the nail is strewn with sparkling glitter. Pink glitter is applied to the black coating.
French manicure
Such a pattern on the nails is done without the use of stencils, since after the shellac dries, they cannot be removed. In this case, the procedure is as follows:
- First, apply the base and dry it under a UV lamp;
- Apply skin-colored shellac to the entire nail and dry it;
- With white shellac we draw a “smile” along the edge of the nail, not forgetting to seal the end;
- We dry;
- If necessary, apply a second layer of white and dry;
- We cover the nails with a top and dry under the lamp;
- remove the sticky layer.
How to make a french and moon manicure yourself (video)
Reverse French manicure option (video)
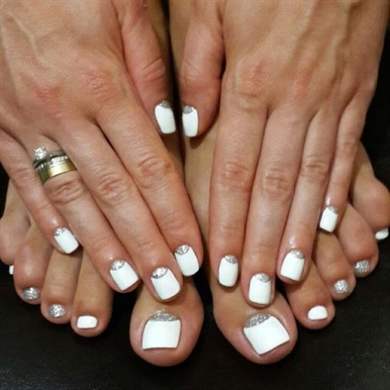
French ideas for long and short nails (photo)
Summer manicure can be done with shellac of different colors The reverse jacket is made of contrasting colors of varnish For the jacket even black shellac is used The jacket is considered a classic wedding manicure Slightly asymmetrical, made with red varnish, the jacket looks very stylish The white border of the nail is painted over with white varnish
We decorate shellac with patterns
For a change, you can decorate shellac with patterns and drawings.
This pattern looks good on contrasting colors of varnish.
To make such a drawing, perform the following steps:

Very popular lately lace pattern on nails. It is made according to the base coat dried under the lamp, for example, beige. For decoration, use a very thin brush of size 0 or 00 and dots. Lace is painted with white shellac on all nails or only on the ring finger. On the rest of the nails, you can perform a simple jacket. The applied pattern is dried under the lamp for 1 minute and a top is applied, which also needs to be dried. You can decorate the manicure with rhinestones.

Gel polish has long revolutionized the beauty industry. This unique material combines best qualities varnish and gel. The easy brush application technology combines with the strength and durability of the polymer, while the base coat provides evenness and good adhesion. But not many people know how to properly apply shellac, so you first need to familiarize yourself with all the rules of this procedure.
Any salon master will make an excellent manicure with shellac without difficulty. But what to do if there is not enough money for a permanent visit to the salon, but you always want beautiful nails? The solution is to manicure gel polish at home.
At first glance, it seems that a salon procedure is much cheaper than purchasing the necessary materials and tools, but this is not the case. The coating lasts an average of two weeks, the consumption of a bottle is very small, so a manicure at home will pay off in two or three applications.
There are, of course, other options to make your nails beautiful, for example, doing extensions that are harmful to nails for four hours, or painting with ordinary varnish, redoing it every day. With gel polish, everything is much easier and faster.
What you need for shellac manicure at home
Choosing a shellac coating, a fashionista receives a two-week manicure in one hour, which does not lose its gloss, does not chip or crack. But such a result is possible only if you know all the subtleties of application. Otherwise, the finish of the socks will come in a few days.
To make pens beautiful, you need to stock up on time, patience and the necessary materials:
- File abrasive 230 grit
- File for natural nails
- Polishing buff
- Degreaser
- Lint-free wipes
- Cuticle Remover
- Pusher or orange stick
- primer
- Bonder
- Base coat
- Pigmented gel polish
- Finish coat
- Dispersion remover
- Cuticle oil
- UV or LED lamp
So that a manicure at home does not disappoint, you need to pay attention to the base and top coats. It is best to choose proven well-known companies, because, chasing profits, you can come across low-quality material. The consequences of such savings can be not only in a short-lived manicure, but also in the harm to shellac nails. The finish and the base must be of a uniform consistency, without lumps and foreign matter. When buying, be sure to check the expiration date of the material.
This is necessary so that the nail plate rests and recovers. During this period, it is better to influence it at home with various strengthening agents.
To properly remove a manicure at home, you need a gel polish remover and sponges on foil. To save money at home, you can take ordinary cotton pads and food foil. The nail top should be cut off before removal, so the coating will come off faster.
Secrets of applying shellac at home


A trip to the salon pleases any female person. Everyone will pleasantly relax in the hands of the master, and trust his experience. Often this pleasantness is relatively expensive, given that such a procedure needs to be done twice a month. Unfortunately, not everyone can afford it, someone does not have enough finances, someone has time. The best solution can be a manicure at home, the main thing is to know how to go through these steps correctly.
After preparing the tools, a very important moment of preparing the hands and nails comes. From this stage depends on how long the coating will not give detachments:
- The first thing to do is to clean the nails of the old coating, even if it is a transparent varnish.
It is best to do a cleansing manicure with a soak a few days before applying shellac.
- Even beforehand, you can remove the cuticle at home by circumcision. This will save at home on a special tool that softens the cuticle.
- If such a tool is already available, you need to apply it to the cuticle area, leveling with an orange stick, and leave for a few minutes to soften.
It is important to remove all dead tissue from the nail, otherwise early detachments cannot be avoided.
- No need to apply various oils, masks and other products before applying gel polish, the surface of the nail must be absolutely clean and dry
- Next, you need to cut off the shiny layer of the natural nail plate with an abrasive file, and sand it with a buff.
In order not to harm your nails in vain, you need to read the instructions for shellac, as some brands do not need to wash down and grind.
- Remove the resulting dust with a soft brush, degreaser or cotton swab moistened with water. Be sure to wait until dry.
- If your nails are naturally damp, or your hands were exposed to water before application, it is best to use a dehydrant. It deeply dehydrates the surface. But if everything is fine with the nail plate, you can do without it.
Further, at home, many make the mistake of skipping the application of primer and bonder, or interchanging them. Of course, at home it is difficult to do everything right, but, nevertheless, you need to try to do it. Primer is applied first. It protects the natural nail plate from harmful effects and pigmentation, removes moisture and degreases. It dries in the air in a couple of minutes. Using a primer, you can not use a degreaser.
After the primer, immediately before painting the base coat for nails, you need to cover the surface with a bonder. It serves for better adhesion of coatings. Of course, at home it is not always possible to use it, so you can get by with just the base, but the period of wearing such a manicure will not be so long. After thorough preparation, you can start applying gel coatings. This technique is simple:
- A very thin layer of base coat is applied. It levels the nail plate and promotes adhesion.
If you paint too thick a layer, then it may simply not dry out under the lamp.
There will also be problems when removing a manicure, since it will take more time to destroy the layer, therefore, there will be more harm from the remover
- Colored shellac also needs to be painted thinly, otherwise the coating will not only dry out, but will also shrink and bubble. Usually, for brightness and good staining, it is simply applied in a couple of layers, polymerizing each. The sticky layer does not need to be removed, it serves as an additional grip
- The finish can be painted with a denser layer than the first two. The topcoat will serve as a shield throughout the wear of the coating. It will protect against tarnishing, scratches and minor damage. Despite the fact that this is the most durable layer, you should not once again check the finish for strength by picking something or using your nails as bottle openers.
Dry each layer for a couple of minutes in a UV lamp, and 30-40 seconds in LED. After the last layer has dried, a dispersion is formed, which can be removed with a nail polish remover, a special liquid or a degreaser. After removing the sticky layer, the finish will shine with gloss, which means the manicure is ready.
Before you start a manicure, you need to find out the nuances of the work. Even self-taught beginners should know some subtleties that will help to do a manicure correctly. We all know that craftsmanship is in the details.
- Be sure to apply moisturizing oil to the skin around the nails and cuticles. At home, you can use ordinary vegetable oil
- If at home, in the process of applying a layer, the substance gets on the skin, you need to carefully remove it. To avoid such troubles, you need to paint the nail, retreating from the skin one millimeter
- When lubricating, you can twist your finger, aligning the gel. In extreme cases, you can remove the uncured coating with a lint-free cloth and a degreaser.
- After the preparatory stage, you should not touch your nails with your fingers, otherwise the sebum will again fall on the surface.
- When applying each layer, you need to brush along the edge of the nail, and a little from the bottom, especially if it's a finish.
Having familiarized yourself with the basics of applying shellac, you can safely begin to practice. After proper application, a manicure can become not only a visual complement to the image, but also a source of pride. This coating will surely appeal to any fashionista, and will take its rightful place on the dressing table.

A durable and sparkling manicure that does not crack with every wrong move is the dream of any woman, and gel polishes become salvation, but many do not want to visit beauty salons weekly and wonder: how to properly apply shellac on nails at home and is it fraught with unpleasant consequences? We will talk about this in this article. 

Materials you will need
It should be borne in mind that this procedure for the first time may seem rather complicated and intricate, because you need excellent eyesight, a strong hand and a lot of accessories, without which you will not get the desired result and there will even be a risk of infection.

Before you start applying shellac, make sure you have everything you need in front of you, viz.
UV or LED lamp
Many are afraid of this item and try to find a way to do without it, but in fact it is impossible. If the nail plates do not succumb to radiation, the varnish simply will not be absorbed and will spread. In fact, there is practically nothing to fear here. For two minutes, the bluish light will not do any harm to your hands.

Basically it looks like an ordinary colorless liquid and protects the nails from gel irritation. It contains some useful material nourishing the nail plate.

Cotton pads, lint-free cloth
It will be needed to clean the nail from fat and in case of leakage of varnish on the skin.

The colored shellac
At first, it is advisable to do only a monophonic manicure, you should not experiment, create contrast and patterns on the nails, until you learn how to apply the gel accurately and without errors.
Alcohol based degreaser
At the very beginning of the procedure, it cleans the nails from the sticky layer, as a result of which the shellac will lay down with even strokes and the desired thickness.

Ordinary soft nail file
Needed in order to give nails correct form and sand the nail plate before painting, which will eliminate bumps and roughness. In the second case, a special synthetic file is used.
Shellac varnish instructions
After making sure that all of the above items are on your table, you can safely proceed directly to the process itself.

First stage
- Round off the nails, removing all sharp edges and making a perfect semi-oval, using a regular file.
Then, with a hard synthetic polisher, run over the nail surface several times in one direction, try not to touch the skin, because in case of violation, wounds are formed - “entrance gates” for any infection, dirt and dust. If the skin is still injured, be sure to treat this place with an antibacterial agent.

- After, be sure to apply a desticky liquid to the nails or use ordinary diluted alcohol. Nail plates should shine and not have a single greasy spot, otherwise even the most resistant gel will start to crack ahead of time and even peel off.

- After cleaning, touch the nails only with brushes, so as not to contaminate the plate again, do not touch with your fingers. If there are wet traces of alcohol liquid left, you can wipe the nails with a lint-free cloth or cotton swabs.

main stage
- With gentle movements, cover the nails with a thin layer of the base product. It is desirable that an untouched surface of 2-3 mm in size remains from the cuticle. Then place your hands under the lamp for 2 minutes. If a burning sensation is felt during drying, then the varnish has flowed onto the skin or you have applied it too greasy. Remove unwanted liquid with a special orange stick. You should get a transparent dry surface of the nails.

- Now start applying the shellac itself. Carefully cover the entire area of \u200b\u200bthe nail with it, leaving no gaps and making vertical lines in one direction. Use the lamp again for 2 minutes, as in point 4. good option there will be an alternation of hands: first, the little finger of the left hand - drying - the little finger of the right hand, etc. This will save time, and also the likelihood that you will catch the varnish that has not yet dried with your hand will decrease. It is recommended to apply two coats of medium density, and after each, place the fingers back into the lamp.

Final stage
- When the shellac is completely dry and evenly distributed over the entire area, fix the manicure with a special finish gel. It is recommended to apply a layer of medium thickness so that the color does not fade and there are no streaks left. Dry again for 2 minutes.
- When all of the above steps are done, complete the procedure with an alcohol-based grease remover. Do not worry, the whole shellac will not be completely removed, only the sticky unnecessary layer formed after the lamp.
Security measures
Do not forget that shellac is a rather difficult substance and, if used improperly, can cause significant harm. For example, when removing it. Many make a gross mistake: they pry off a piece of varnish and begin to pull it off, hoping that the product will be removed without any hassle, but this is far from the case. You risk seriously damaging the integrity of the nail and losing the top surface.

It is also necessary to pay attention to the condition of the nails in the first days after applying the gel. Due to the color layer, you are unlikely to be able to see blue, cracks, but if there is soreness, swelling, redness of the cuticle, consult a doctor immediately. Do not close your eyes to skin lesions around the nails, since all this is dangerous due to the penetration of bacteria, and due to the close location of the capillaries - infection in the blood itself.

Completion: if you did everything correctly and clearly, you should get beautiful nails with a perfect, rich and fresh manicure that will please its owner with durability and save you from the daily adjustment of peeling varnish.

Video on how to apply shellac correctly:
One of the additions to the image of any girl is beautiful well-groomed hands. Often girls cover their nails with varnish just before going to work, or before going to any event. But in this case, the varnish will last literally 2-3 days. The best solution is to cover the nails with shellac. Therefore, it is not superfluous for every girl to know how to properly apply shellac on her nails.


What is shellac: gel or varnish?
Shellac is a material that covers the nail plate. It is quite resistant, keeps on the nails for about 5 weeks. After this time, it is necessary to cover the nails with a new layer of shellac. It is applied on the nails quite simply, like regular nail polish. You can remove shellac from the nail with the help of a special liquid, which cannot be done with the extension gel. The color scheme of shellac is quite diverse, you can easily choose the color of shellac for any image. Applying shellac to your nails is easy, having all the necessary materials. Shellac cover nails not only on the hands, but also on the legs. The nail plates on the legs do not grow very quickly, unlike the nails on the hands, it will be enough to do a high-quality pedicure once every two months.


Necessary materials and tools
In order to cover nails with shellac at home, you need to prepare all the necessary tools and materials in advance.
Choosing a shellac coating, a fashionista receives a two-week manicure in one hour, which does not lose its gloss, does not chip or crack. But such a result is possible only if you know all the subtleties of application. Otherwise, the finish of the socks will come in a few days.
To make pens beautiful, you need to stock up on time, patience and the necessary materials:
- nail file abrasive
- Nail file for natural nails
- Nail file
- Napkins
- Protective nail coating
- Cuticle remover
- Degreaser
- Orange stick
- Nail bonding agent and shellac
- Basic coating
- Sticky layer remover
- Cuticle oil
- fixing coating
- Lamp ultraviolet
When buying the necessary materials, it is important that the base coat is of high quality, this is also necessary in order to keep all layers of the applied products for a long time. It is better to stop your choice on well-known, proven companies. Maybe the amount will be a little higher than what you expected. But it's better than buying cheaper materials, which are usually of poor quality. Such funds will not allow the manicure to last for a long time, and also harm the nails. The fixing and the main coating must be uniform in consistency. When buying, you should always check the expiration date of the material.
Shellac should be worn for no longer than two weeks, and then take a break, allowing the nails to rest.

We cover the nails with shellac. Sequencing
To apply varnish you need to know a few rules. You need to do everything, slowly, carefully:
- Before applying shellac to the nails, prepare them. To do this, we do a manicure, as usual, and with the help of a nail file we shape the nails.

- Be sure to process the cuticle, pushing or cutting it. After that, the nail plate is polished with a special nail file.
- Then we wipe the surface of the nail with a degreasing agent using a cotton pad, so that the gel polish adheres well to the nail.

- But only disinfection is not enough, in order to keep all the products applied to the nails longer. Therefore, it is important to degrease the nails, for this we apply a nail bonding agent and shellac, in a thin layer.
- This completes the preparatory phase. Next, we proceed directly to the application of shellac. Shellac is applied in three layers. The first layer is the main, gel coating. After the gel is applied to the nails, dry them for a minute in an ICE lamp. The resulting sticky layer is not removed, it increases the strength of the coating.
- Then apply colored shellac in one layer. After that, dry the nails in a UV lamp for about 2 minutes.

- Next, apply a second coat of varnish to even out the color. And also dry the nails, as we did after applying the first layer.
- The next step is to apply a top coat. The thickness of this coating should be somewhat greater than the thickness of the colored layer. The fixing coating should lie flat, it is worth paying special attention to the edge of the nail. After that, dry the nails in an LED lamp.

- Next, you need to remove the sticky layer. It is better to do this with the help of a special tool, if there is no such tool, then you can use an alcohol-containing liquid. Then we moisturize the cuticle with special oil. This must be done because after exposure to ultraviolet light, the cuticle becomes dry. The process of applying shellac is completed here. Nail design options are shown in the photo:


Advantages and disadvantages of shellac
The advantage of shellac is that it is very practical. Often there will be no need to adjust the manicure, because it will always look neat. Due to the fact that shellac is applied in several layers, the nails become dense, so it will not work to damage the nails. This gel polish is universal, even on short nails it will look very nice.
The disadvantages of shellac include its price, such a coating is not cheap. But still, it is more profitable to cover your nails with gel polish at home than in salons. The fact that shellac lasts for a long time can be attributed to its minus, because you can get tired of the monotony. We have to go back to the salon to change the coating. And a manicure that is done at home will not cause problems, because. You can remove the old coating yourself and apply a new one.
The video presents materials on how to properly cover nails with shellac:
Well-groomed hands are one of the essential components of the image of a girl.
However, not every girl wants to spend a lot of time on a manicure.
After all, if you paint your nails with ordinary varnish, a fairly common problem arises - the varnish is quickly erased or chipped. Therefore, acrylic came to replace the usual varnish coating.
Acrylic nail extensions have been popular for a long time, but the acrylic coating had its drawbacks - after removing the extended nails, your nails became brittle, brittle and required a long recovery.
And the nail extension procedure itself is quite complicated to cope with it on your own at home.
Therefore, the beautiful half of the world's population needed an innovative tool that could be applied to nails easily, like varnish, but so that the durability of the coating was not inferior to the durability of extended nails. Such a tool already exists and is wildly popular among girls. This coating is called shellac or gel polish. Read more about what kind of coating it is and how to properly apply shellac - later in the article.
Shellac - what is it?
Resistant as a gel and easy to apply as a varnish - this is how you can characterize shellac. This coating was developed in the United States. Shellac absorbed best properties and from ordinary nail polish, and from gel for building. The gel polish coating easily stays on the nails for up to 4, and in some cases even up to 6 weeks. That is, the need to update the manicure arises only because of the growth of the nail, and not because of the fragility of the coating. This is one of the most important, but far from the only positive quality of this popular coating. Consider other advantages of shellac:
1. Ease of coating. As mentioned earlier, shellac is applied like a regular varnish, there is nothing complicated in the application procedure. No need to file off the top layer of the nail before applying the coating, gel polish is applied to the nail plate without any special preparation. Therefore, you can apply shellac on your own, without outside help, at home.
2. The cover is easy to remove. To remove shellac, you do not need to cut it off and spoil the nail plate. A special liquid for removing shellac coating will cope with this task.
3. Gel polish allows you to grow your own nails and does not impair their quality. However, many girls use cheap gel polishes, which include aggressive ingredients, so the quality of the nails after the procedure leaves much to be desired. But if you buy high-quality gel polish and know how to properly apply shellac on your nails, there will be no problems with the condition of the nail plate. In addition, shellac protects nails from environmental influences and mechanical damage.
4. Shellac dries quickly under the influence of a UV lamp, unlike acrylic. Therefore, the procedure for applying shellac takes from 40 minutes to 1 hour maximum. Compared to the procedure of nail extension, it is very fast, because the extension, as a rule, lasts at least about 2 hours.
5. Shellac coating does not fade over time. This means that the nails will look like they had a manicure just recently, even after a couple of weeks have passed.
6. Variety of colors. On sale there is a huge number of gel polishes, completely different shades, including gel polishes with sparkles. Shellac, unlike ordinary varnish, does not “smear” when applied, so it is much easier to create patterns on nails using gel polish.
7. There are no allergic reactions to shellac. Therefore, this coating can be applied even to pregnant and lactating women.
The advantages of shellac coating are many which is why it is so popular with girls. But, there are also disadvantages:
1. The need to purchase a UV lamp (LED lamp). Such a lamp is not very cheap, but without it it will not be possible to apply shellac.
2. It is difficult to apply the coating on the right hand if you make shellac yourself. This is more of a nitpick than a minus, because even when applying ordinary varnish, every girl faces such a problem.
3. The need to purchase a special tool for removing shellac.
The minuses of shellac are much less than the pluses, and they are not so significant. Therefore, this procedure can definitely be recommended to all girls. But few people know how to properly apply shellac at home. Therefore, the technology of applying this coating will be discussed further.
How to apply shellac correctly: a sequence of actions
In order for the gel polish to last on the nails as long as possible, it is important to know how to properly apply the shellac coating. If the sequence of actions is not followed, the coating may peel off. Detachment can also occur due to the low quality of gel polish, so it’s better not to try to save money, but to purchase high-quality gel polish.
In order to make a manicure using shellac coating, you need to purchase the following things:
1. Nail file, manicure brush and other manicure tools
2. Antibacterial agent
3. Nail degreaser (bonder gel)
4. Base gel polish
5. Color gel polish
6. Fixing (finishing) gel polish
7. UV lamp (LED lamp)
8. Liquid for removing the sticky layer (clinser)
9. Cuticle oil
10. Cotton pads
Of course, to buy all these things for home, you need to have an impressive amount of money. But the amount spent will pay off in a few months, since the services of a manicure master are not cheap. If there is no desire to purchase such a large set, it is better to contact a trusted master who uses only high-quality materials. However, if it was decided to learn how to do a manicure with a coating on your own, then you definitely need to learn how to properly apply shellac to your nails.
1. Before applying the coating, the nails must be prepared. To do this, it is enough to make a regular trimmed manicure or give the desired shape to the nail with a nail file. Be sure to push back and trim the cuticle so that the manicure looks as neat as possible. After that, it is better to grind the surface of the nail with a special grinding file, and then, with a manicure brush, remove dust after filing and grinding.

3. But disinfection alone is not enough to keep the shellac very firmly on the nail. Therefore, degreasing is a very important step. To degrease the surface and remove moisture, it is necessary to apply a special bonder gel in an even thin layer on all nails. If moisture, fat, traces of cream or oil remain on the surface of the nail, then shellac can simply peel off and all work will be in vain.
4. If the artificial nails did not hold well in the past and subject to all the points, then the next step is to apply a primer. It will help avoid breakouts. Apply the primer in a thin layer on the nails and dry without an LED lamp for two minutes.
5. The preparatory stages are over, now you can start applying the coating itself. Correctly apply shellac in 3 layers. The first layer is the base gel. This gel is clear in color and has no harsh chemical odor. After applying the base gel, the nails must be dried in the LED lamp for one minute. The sticky layer that will be on top of the coating does not need to be removed, otherwise the shellac coating will last on the nails for a fairly short time and quickly peel off. A sticky layer allows between the base and color gel to increase the durability and strength of the coating.

6. Next, you need to apply colored gel polish in one layer. No need to spread a large amount of gel polish, like a gel for building. A thin layer will suffice. The main thing is to paint over the entire nail, especially you need to pay attention to the edge of the nail. After application, the nails must be dried in a UV lamp for two minutes. And, similarly to the previous stage, the sticky layer does not need to be removed. This procedure will be performed at the very end of creating a manicure.

7. To even out the color, make it more saturated and paint over the “flaws” of the first color layer, it is necessary to apply a second layer of colored gel polish. Next, the nails need to be dried in a UV lamp for 2 minutes.

8. The next step is to apply the final coat. After that, you don't need to apply anything. The colored layer is covered with a finishing (top) gel polish. It must be applied as carefully as possible so that there are no streaks left. The thickness of the top coat should be a little more than the color layer. Fixing gel polish should lie flat, especially you need to pay attention to the edges of the nail. After application, the nails must be dried in an LED lamp for two minutes.
9. Only now it is possible and even necessary to remove the sticky layer from the surface of the nail. It is better to do this with the help of a special tool - clinser, but some people use alcohol at home.
10. Then you need to moisturize the cuticle with a special oil. It is better not to skip this step, since the cuticle was exposed to ultraviolet rays during the procedure and moisturizing is now necessary for it. This completes the process of applying shellac.

How to properly apply shellac is not difficult to figure out, because the process of applying this coating is very similar to applying ordinary nail polish, except for the moment of drying the nails in a UV lamp. But there are some tricks and subtleties in this matter that professionals know better than "self-taught girls".
The first and most important rule is no peeling nails! Before applying shellac, it is imperative to cut off the detachment, since under the coating the detachment of the nail will not go anywhere, and even more so it will not “heal”. The exfoliating nail will not be able to “adhere” to the coating normally, as a result of which the shellac will quickly peel off.
In everyday life, women often use cleaning products that contain alkali. It is after using alkaline products that shellac cannot be applied. Hands must first be thoroughly washed, only then proceed with the application procedure.
Degreasing is extremely important, without this stage, the manicure will be very short-lived. Therefore, special degreasing agents must be used!
As for the choice of UV lamp, 36 watt lamps are usually used. They are easy to find in specialized stores. You can also purchase a 9-watt UV lamp, but you will have to increase the drying time of the nails from 2 to 3 minutes.


