No one can argue that this sweet delicacy is so loved by adults and children that they are ready to eat it in both hot and cold weather. The time of year has ceased to be a determining factor when choosing ice cream as a dessert. This can be confirmed by the always full freezers in stores, where even in the middle of winter there is a good selection of a variety of ice cream. Thanks to this, you can enjoy the taste of dessert at any time, but that’s not all. When you learn how to make ice cream at home, which will be tastier, easier and healthier than store-bought, there will be no obstacles left for you on the path to true taste bliss.
Honestly, I was skeptical for quite a long time about this possibility of making my own ice cream at home, believing that it couldn’t be so simple and tasty. I thought that it was not for nothing that large productions were so complex, and that the recipes were probably abstruse and inaccessible to the common man.
This is partly true, of course, recipes for store-bought ice cream are not available to us, but are they necessary? I was convinced that they were not needed. After several successful experiments with attempts to make ice cream at home, I realized that homemade ice cream recipes are incredibly simple, and the delicacy itself turns out much tastier and healthier, without chemicals, additives and all kinds of substitutes. All my household members unanimously abandoned store-bought ice cream in favor of home-cooked ice cream, and even began to take part in its preparation, adding their own ideas, flavors and decorations.
I’ll tell you which recipes I tried from my own experience and gave them solid A’s!
Let me start with the fact that I first tried to make the simplest creamy ice cream with my own hands. Or as it is also called ice cream. I think that this is a classic that is relevant for all times and is loved by almost everyone. Add fruits, syrups, chocolate to it and there is no tastier dessert, even for a holiday or on an ordinary day. Fresh berries from the garden, jam from stock, syrup from the store, chocolate chips - this is what can be added to the most ordinary creamy ice cream made at home.
How to make ice cream Sundae at home
For myself, I call this recipe for homemade ice cream “Ice cream according to GOST.” I cannot guarantee that this is how the recipe is presented in GOST, because I could not find the original document on the Internet, only its reprints and interpretations on many different sites. But the most important thing that was learned is that all products must be natural and no vegetable fats or substitutes.
The ice cream recipe according to GOST from recognized internet chefs includes:
- cream 30-35% - 500 ml,
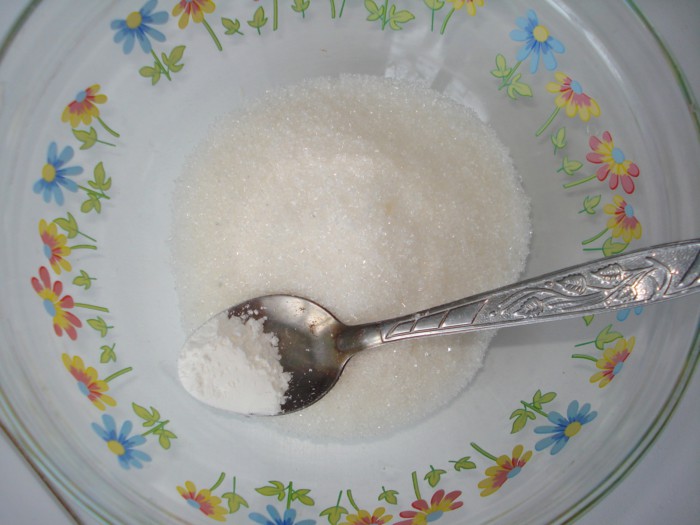
- milk - 150 ml,
- granulated sugar (or powdered sugar) - 150 grams,
- egg yolks - 3 pieces,
- vanilla extract/vanilla/vanilla sugar for vanilla flavor.
Making your own ice cream, step-by-step recipe:
1. A secret that I understood over time and now strictly follow it - the cream for making ice cream at home must be cooled. So put them in the refrigerator in advance.
2. Separate the egg yolks from the whites. In case you don’t remember how to do this, let me remind you: split the egg shell into two even halves and open it so that the yolk remains in one of the halves and the white flows into another container (cup, plate). The white will drain, but not completely, so while continuing to hold the egg over the cup, carefully pour the yolk from one half of the shell to the other, another part of the white will drain. Repeat again if the white remains until there is only one yolk in the shell. Place the separated yolk in another cup or saucer and do the same with the rest of the eggs.
If this “grandmother’s” method is difficult for you, now you can buy special devices for separating yolks in stores. Most of them look like a spoon with slits into which the white flows, while the yolk remains inside.
3. In a separate bowl, grind the yolks with sugar until smooth. Sugar cannot be completely dissolved, so many people use powdered sugar. But even if you have regular granulated sugar, it’s not scary, later you’ll understand why.
4. Pour milk into a bowl with eggs and sugar and stir with a whisk.

5. Pour the resulting yellowish mixture into a saucepan and place on the stove over low heat. It is necessary to heat the mixture, but do not let it boil, otherwise the eggs will cook. To make ice cream thick at home, this mixture must be heated to a maximum of 80 degrees and stirred constantly.
Gradually it will begin to thicken. Egg yolks will help her with this. If you don’t know, professional chefs use yolks to thicken anything from creams to sauces and gravies. This is a method that has long been known throughout the world using natural products.
Don't worry about using raw eggs in your ice cream; heating them this way will rid them of bacteria, being a homemade version of pasteurization. This same heating will help the sugar completely dissolve. Our homemade ice cream will not crunch on your teeth.
To understand that the mixture is ready, you need to dip a spatula or wooden spoon into it. The mixture should remain on the spoon, and if you run it with your finger or knife, the groove will not spread or run off. Something like this.

6. Now this mixture must be cooled to room temperature. To do this, take a larger saucepan and pour ice water from the tap into it, you can add ice cubes. Then place the saucepan with the egg mixture in it, as if you were going to cook in a water bath. Stir the mixture with a spoon for several minutes so that the lower cooled layers mix with the upper warm ones until the whole mass has cooled.
As it cools, the mixture will thicken a little more. Egg yolks keep working!
7. When the egg mixture is ready, remove the cream from the refrigerator and beat it in a large bowl until it forms a nice thick cream. The main thing is not to overdo it so that they do not thicken to the point of butter. This is unfortunately another problem that can arise when making ice cream at home.

I check the doneness of the whipped cream by the fact that it does not flow out of the bowl if it is tilted well, but remains motionless.
8. The next step is to mix the whipped cream and egg mixture. At the same time, add vanilla sugar (1 whole packet) or vanilla liquid extract (teaspoon) to give the ice cream a vanilla flavor.

Mix everything carefully with a spoon or spatula so as not to knock off the creamy foam. In this case, it is better not to use a mixer. You need to achieve a uniform texture and color. The result should be a thick cream that is delicately creamy in color (by the way, it tastes simply amazing. Tested by all household members who control the process).
9. Now the ice cream needs to be frozen. But this must be done taking into account the fact that you will have to take it out of the freezer several times and beat it with a mixer to break up the ice crystals and saturate it with air. This is the only way to get real soft ice cream at home.
Any large container in which it will be convenient to re-beat is suitable for freezing. It can also be the same bowl, covered with cling film (we don’t want extra odors from the freezer in the ice cream), or a plastic food container with a tight lid will do. Even plastic jars from store-bought food that have already been eaten will work. The main thing is to wash them thoroughly.
Cover the ice cream and place in the freezer for an hour.
10. In this recipe, I prepare ice cream at home without using a special ice cream maker, so after exactly an hour we take out the container with ice cream and beat it again with a mixer.
After an hour it will thicken only slightly and it will be easy to beat. Mix the ice cream thoroughly from the edges to the middle. Cover again and place in the freezer for another hour.
After an hour, repeat the procedure. The ice cream will become thicker and form lumps at the edges of the container. Stir until smooth with a mixer and put back in the freezer.
In my experience, you need to whip the ice cream this way at least 3-4 times, then it turns out airy, like the real thing. If you don’t do this, then its texture when frozen is so dense that it will be very difficult to get it out of the bowl even with a special spoon. Without whipping it makes a great butter brick.
11. After churning several times, leave the ice cream in the freezer for 8-12 hours. Ideally overnight. In the morning, an amazing treat will be waiting for you.
To get it out of the bowl, use special round spoons heated in boiling water. You can do this with a regular spoon. Just hold the spoon in a cup of hot water for just a couple of minutes.

This is how easy it is to make ice cream at home, and not just ice cream, but a real creamy ice cream! Help yourself, treat your guests and enjoy incredible deliciousness!
If this recipe seemed too long and complicated to you, move on to the second one, which is difficult to come up with simpler.
The simplest ice cream at home made from cream and condensed milk

I can’t help but tell you about this interesting homemade ice cream recipe. On the one hand, it can be called a recipe for the lazy, since a simpler way to prepare creamy ice cream at home has simply not been invented. But on the other hand, the result is very worthy.
The only thing about this recipe that I don’t even consider a minus is that the ice cream turns out very creamy and sweet. That is, completely non-dietary. But if you are not a follower of strict diets, this is simply unimaginably delicious. Of all the friends I treated to this ice cream, everyone was happy, and the children generally squealed with delight, because the delicacy is better than any candy.
What is the secret of this homemade ice cream recipe? The fact that only 2 ingredients are used, plus vanilla for taste.
- natural cream 30-35% - 500 ml,
- condensed milk - from 200 ml.
- vanilla sugar or vanilla essence to taste.
Why is the measure “from” indicated for condensed milk? It's simple, the more condensed milk, the sweeter the ice cream will be.
After several tests, carried out with different quantities of the condensed half of the recipe, I identified a combination of products that was acceptable to our taste: 1 part condensed milk to 2 parts cream.

I started my tests with the simplest proportion of a standard half-liter package of cream and a standard 380 ml can of condensed milk. It turned out simply amazing, but much sweeter than the usual store-bought ice cream or the ice cream according to the recipe above, made from milk and cream. There was clearly less sugar there.
Another cooking feature: the taste and quality of ice cream at home will depend on the taste and quality of cream and condensed milk. Bad, cheap cream with a suspicious unnatural composition from little-known manufacturers spoiled everything. Condensed milk with vegetable fats and milk powder spoiled everything. No, we were not poisoned, but the taste suffered greatly. A strange powdery appearance appeared on the tongue or unpleasant vegetable fat settled on the lips.
Therefore, the most important principle of choice: always take proven tasty and high-quality cream and condensed milk with a good uniform consistency and sufficient thickness. 30% cream cannot be liquid like milk, it simply will not whip into an airy mass. Condensed milk that is not made from whole milk can spoil the taste and consistency. Choose everything wisely and it will turn out very tasty.
Making ice cream at home from cream and condensed milk:
1. Before preparing the ice cream, thoroughly cool both the cream and condensed milk. A couple of hours in the refrigerator, no less. This is necessary so that the products are well whipped into foam.
You can also cool the beaters of the mixer with which you will beat.
2. Whip the chilled cream until it is thick and airy until it is fluffy enough to not flow out of the plate. Well whipped cream is similar to cream.

3. Add vanilla sugar (1 sachet). Then, without ceasing to beat at low speed, pour in the condensed milk. You can mix the condensed milk with the cream with a wooden spoon or spatula until you get a homogeneous consistency. The mass will turn out to be a little more liquid than the cream was before, with a pronounced vanilla scent and a delicate creamy tint.
4. Pour the future ice cream into a container for freezing. A large bowl that can be covered with cling film, a plastic food container with a tight lid, or, for example, boxes and containers of store-bought ice cream that you have eaten a long time ago are suitable for this.

In fact, the main thing is that the container can be tightly closed and placed in the freezer. Foreign odors stick very easily to this creamy mixture.
5. Now the most important thing that will turn our delicacy into real ice cream - every hour it must be stirred or whipped at low speed with a mixer.
Why is this necessary and why is it so vital? The thing is that the secret of ice cream is that the creamy mass is filled with air. According to GOST of Soviet ice cream, up to 200% air in the mass of ice cream was allowed. Can you imagine how airy and delicious it turned out?
From my own experience, I will tell you that when I did not churn the ice cream at home at least three times, it turned out to be too hard and it was extremely difficult to remove it from the mold. One tablespoon was bent almost irrevocably, despite its pre-heating in boiling water. And eating ice cream that melts on your tongue is much tastier.
The whole process of mixing/churning comes down to the fact that you need to remove the ice cream from the freezer, open the lid and beat it thoroughly directly into the freezer container. Do this several times until you realize it has become too thick to whisk.
The freezing speed depends on the volume of the container and the power of the freezer, so it may be different for everyone. Small flat trays freeze much faster than a large bowl. For small containers, it is advisable to beat the mixture after half an hour, rather than an hour.
6. Ice cream at home from condensed milk will be ready in about 8-12 hours. You can serve it on the table!

Homemade creamy ice cream with Kit Kat and Oreo
This is how you can diversify this simple recipe for making homemade ice cream by adding your favorite Oreo chocolate chip cookies and Kit-Kat wafers.
The advantage of homemade ice cream is that you know exactly what ingredients you put in when making it. The basic cold dessert recipe contains cream. However, you can make delicious homemade ice cream without them if you are on a low-calorie diet. So let's talk about no cream.
Recipe with milk
From milk without cream? It's actually very simple. The dessert will taste like custard.
Ingredients:
- Milk - 2.5 cups.
- A glass of sugar.
- Four yolks.
The milk must be brought to a boil and then cooled. Grind the yolks well with sugar. Continuing to beat them, carefully pour in the warm milk. Then put the mixture on fire. It needs to be brought to a thick state, but be sure to stir all the time and let it cool. Once the mixture has cooled to room temperature, you can cover the pan with a lid and place it in the freezer for a couple of hours.
During this time, every half hour you will need to take out the dishes and mix the contents. This is necessary to prevent ice from forming inside. When the ice cream has almost the desired consistency, it should be poured into molds and sent back to the freezer. After three hours, the dessert is ready and you can eat it. It can be served with jam, syrup, liquid chocolate and nuts.
Knowing how to make ice cream without cream, you can make it at home at any time. Moreover, this requires the simplest products.
Cottage cheese ice cream
When talking about how to make ice cream at home without cream, you should remember the recipe based on cottage cheese. This dessert will be useful for the youngest fans of cold sweets.
Ingredients:
- Boiled condensed milk.
- ½ glass of milk.
- 420 grams of cottage cheese.

Our ice cream is almost ready. All that remains is to put it in molds and put it in the freezer to harden. In four hours it will be ready to eat.
If you want to make absolutely natural and healthy ice cream for your children, then you can prepare condensed milk yourself, since the quality of this product is currently very much in doubt.
For this you will need three liters of milk and a liter jar of sugar. All this must be mixed, brought to a boil and simmered for three to four hours over low heat, constantly stirring the mixture.
As you can see, there are many options for making creamless ice cream using other dairy products. And the result is no worse.
Fruit icecream
When thinking about how to make homemade ice cream without cream, you should not forget about the fruity cold dessert. There are many fans of frozen juices among us.

It should be noted that sorbet is the least high-calorie and most vitamin-rich version of a summer delicacy. For cooking we will need the most common products. So, you need to take natural yogurt and frozen cherries in equal parts (ratio 1:1). Add sugar to the mixture (depend on your taste) and beat in a blender until the mass is completely homogeneous.
The following fruits go best with milk: grapefruits, peaches, strawberries, gooseberries, currants, apricots, bananas, oranges, apples. To prepare sorbet, remove peels and seeds from the fruit and chop it. The tails of the berries should be removed. Next, freeze the fruit and berry preparation.

After a couple of hours you can continue cooking. Beat the fruits with milk until smooth in a blender (ratio 2:1). Sugar is added to taste. Place the finished mixture in the freezer to harden. After three hours, you can enjoy your homemade dessert. You can see that there are many options for making ice cream without cream.
Fruit ice
How to make ice cream without cream? Very simple! The simplest option is fruit ice. You can take any available fruit. We suggest taking a mixture of raspberries and strawberries (600 grams). Grind the berries in a blender, resulting in a fruit puree. You need to rub it through a sieve and add a couple of teaspoons of lemon juice.
Pour one hundred grams of sugar into a saucepan and fill it with forty milliliters of water, prepare the syrup. As soon as it cools down a little, pour it into the berry mass, mix and put it in molds, put them in the freezer.

This one, prepared at home, can be supplemented with any ingredients. Lemonade or fruit juice gives an interesting taste. And pieces of exotic fruits will add originality to the taste. This fruity cold delicacy will not stay in the freezer in hot weather.
Homemade ice cream
Without cream? You can also make ice cream if you wish!
Ingredients:
- Half a stick of butter.
- A liter of milk.
- Five egg yolks.
- A teaspoon of starch.
Milk must be poured into a saucepan (enamel) and put on low heat, bring to a boil. Meanwhile, mix starch and sugar. Next, add the yolks and grind them until smooth. Then add a little milk into the mixture. It should have the consistency of liquid sour cream.

Now you can carefully pour our mixture into the hot milk. And don't forget to stir constantly. The liquid should return to a boil. After this, the dishes should be removed from the heat and you can place them in cold water, while continuing to stir the mixture. As soon as everything has cooled down, pour the mixture into molds and put it in the freezer to harden. After three to four hours the ice cream is ready.
Chocolate treat
For chocolate ice cream lovers, we offer the following recipe.
Ingredients:
- Five yolks.
- Half a glass of sugar.
- Half a liter of milk.
- A glass of cocoa or brewed coffee.
- A little liquor.
The yolks need to be beaten with sugar. Pour milk and coffee into a heat-resistant bowl, put the mixture on the fire and bring to a boil. Add yolks with sugar. Bring to a boil again. You can add liqueur for taste. Irish Cream, for example, is perfect. Next, place the pan in water to cool. Pour the mixture at room temperature into molds and place in the freezer.
For cooking, it is better to use homemade eggs and milk. You can add nutmeg, cinnamon, and vanilla to chocolate ice cream. These components give a special charm to ice cream.
Chocolate ice cream
Chocolate ice cream can be made not only using coffee. For chocolate lovers, the following recipe is more suitable:

- A bar (one hundred grams) of dark or milk chocolate (can be replaced with cocoa and sugar).
- Milk - 350 grams.
- Sugar - 70 grams.
- A little butter.
The chocolate must be crushed and then melted in a water bath. Then add twenty grams of sugar, milk and butter to it, mix. The mass must cool down. Then add sugar and mix.
Transfer the resulting mass into a mold and place it in the freezer. You can also add this ice cream to create a very tasty combination.
Instead of an afterword
In the hot summer heat there is nothing better than ice cream. Homemade cold dessert is especially tasty and healthy. There are many recipes for making ice cream. Everyone can choose a good option for themselves. Even those with a sweet tooth who adhere to a strict diet can please themselves with low-calorie ice cream without cream.
The most delicious homemade ice cream is in our selection! Prepare what you like - ice cream, creamy, chocolate!
- cream from 33% - 200 ml;
- milk - 100 ml;
- egg yolks - 2 pcs.;
- sugar - 60 g;
- vanilla pod - 1 pc.

Mix milk with sugar in a small saucepan with a thick bottom. Using a knife blade, cut the vanilla pod along its entire length, remove the seeds and also add to the milk mixture. Thanks to vanilla, the ice cream will be filled with a delicious natural aroma, but in the absence of this ingredient, you can get by with a bag of vanilla sugar or a pinch of vanillin. Heat the mixture until hot, but do not bring it to a boil.

In another container, gently beat the egg yolks using a whisk. In this case, we just need to achieve homogeneity - we should not beat the mass, otherwise foam may form on the surface, which will complicate the process of preparing the ice cream.

Pour hot milk into the mashed yolks in a thin stream, continuously stirring the mixture.

Pour the resulting mixture into a saucepan, place on low heat and cook until slightly thickened. It is important not to overheat the milk, otherwise the yolks may curdle! To avoid this trouble, choose a thick-bottomed pan for cooking the cream and cook over low heat. Also, do not forget to continuously stir the cream, especially at the bottom (it is most convenient to use a silicone spatula for this).

We check readiness as follows: run your finger along the silicone spatula. If the mark remains clear and does not float with cream, immediately remove the pan from the heat.
Tip: if the yolks still curdle, you can grind the mixture through a fine sieve or puree with a submersible blender. However, unfortunately, it is no longer possible to avoid the eggy taste of the ice cream. In this case, it is better to remove the pan from the heat sooner rather than later.

Cool the freshly prepared cream to room temperature. At the same time, whip the cold cream until thick.

Add the cooled cream to the whipped cream mixture and mix. Chill the mixture in the freezer for 3 hours. During this time, it is necessary to remove the container 5-6 times and mix the mass thoroughly to avoid the formation of ice crystals and to obtain a smooth and uniform texture.

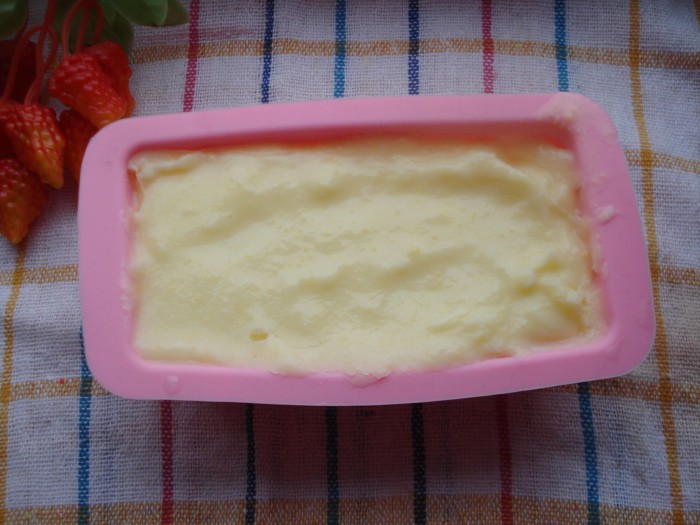
When the consistency of the mixture becomes similar to soft ice cream and is difficult to mix, transfer the mixture into a silicone mold, cover with a lid and put it in the freezer for another 3-4 hours (you can leave it overnight).

Before serving, let the frozen ice cream sit for a while at room temperature. Then scoop up the slightly melted mixture with an ice cream spoon and form into balls. If desired, complement the dessert with chocolate chips, mint leaves or berries.

Recipe 2: homemade ice cream - creamy ice cream
- 500-600 grams of whipping cream (fat content from 30%)
- 100 grams of powdered sugar (or fine sugar)
- a pinch of vanillin

Place chilled cream, powdered sugar and a little vanillin in a deep bowl. Beat until fluffy and stable foam is achieved, 4-5 minutes.

Place the whipped mixture in a plastic container.

Place in the freezer overnight.
We take out the ready-made ice cream, let it thaw a little and you can put it in bowls.

This ice cream can be made in different ways - with the addition of cocoa (carob), frozen berries - it is especially tasty with honeysuckle (only the berries must first be pureed with a blender, and then added to the whipped mixture and beat again).

Recipe 3: how to make homemade ice cream sundae?
The recipe for homemade ice cream sundae can be reproduced at home, it will turn out very tasty, natural and taste like the Soviet ice cream.
- egg yolks (4 pcs.);
- milk (300 ml);
- cream (33%, 300 ml);
- powdered sugar (180 g);
- vanillin (½ teaspoon).

So, first of all, bring the milk to a boil and then cool it to approximately 30 degrees.
Add powdered sugar and vanilla sugar to the yolks.

Whisk.

Pour in milk. Beat again.

Place on low heat and stir until the mixture thickens. As everyone around advises, you can check the thickness by running your finger along the spatula - if a clear mark remains, the mixture is ready.

Let cool to room temperature and then chill in the refrigerator.
Meanwhile, whip the cream.

Mix with cooled cream.

We transfer the entire mixture into a container in which it will be convenient for us to mix the future ice cream with a blender.

Then take it out and quickly (so that the ice cream does not have time to melt) mix with a blender.

Place it in the freezer again for 2 hours. We repeat the procedure 2-3 more times with an interval of 30-60 minutes. Thanks to the blender, the ice cream will have the desired structure. A blender allows you to crush ice crystals and form an airy mass.
When the ice cream is completely frozen, take it out and use a special spoon to make balls. You can first put the ice cream in the refrigerator for about 15 minutes so that it melts a little - this will make it much more convenient to make balls.

Place the ice cream in bowls and sprinkle or top with whatever you like. I - grated chocolate. Homemade ice cream tastes just as good as store-bought ice cream, and its content is guaranteed to contain no “extra” additives. Recipe tested.

Recipe 4: homemade ice cream and milk ice cream
- milk - 1 glass;
- butter - 25 grams;
- egg yolk - 1 piece;
- sugar - ½ cup;
- vanilla sugar - 5 grams;
- starch - ½ teaspoon.

In a deep, convenient container, mix sugar, starch and vanilla sugar.
Add one egg yolk.

Grind the mixture until smooth. Pour in a little milk.

Place the remaining milk on the fire. Add 25 grams of butter. The butter must be real, consisting of 100 percent cream from cow's milk. Bring the mixture to a boil.

Pour the egg mixture into the boiled milk. Stirring, bring to a boil. Remove from heat and place in cold water. Cool, stirring occasionally.

Pour the cold mixture into molds. It can be a large form or small portions. I have a large silicone mold and molds for small cars.

Place the molds in the freezer for a couple of hours.
Ice cream from small molds will be ready in 30-50 minutes. Taking it out of the silicone molds is very easy.

From a large mold, spoon ice cream onto serving plates. It is incredibly tasty, tender and aromatic.
Recipe 5: how to make ice cream at home
- 0.5 liters of cream (the higher the fat content, the tastier the ice cream will be)
- ¾ cup sugar
- 4 chicken eggs
- Chocolate chip cookies (or other flavors)

Break eggs into a bowl and add sugar.
Beat well with a fork and grind the sugar. Pour in the cream and mix well again.
Pour the resulting mixture into a small saucepan and place over very low heat. Stir constantly, do not bring to a boil, otherwise the eggs will curdle. Remove from heat when the mixture begins to thicken; the consistency should resemble liquid sour cream.
In total, the pan will spend 15 - 20 minutes on the fire. Well, you can also find out the readiness of the desired consistency by running your finger along the spoon. If the spoon is covered in cream and a fingerprint remains, the mixture for homemade ice cream is ready.
After removing from the stove, pour the mixture into any container convenient for freezing. In general, any food-safe plastic container can be used.
Add any filling (in this case, crushed cookies, or you can use berries, chocolate chips or pieces of fruit).
Let sit for about an hour until the mixture cools slightly (the mixture will cool faster if you place the container in a sink with cold water). Then transfer the container with the mixture to the freezer. Homemade ice cream will harden and gradually thicken. The thickening time can range from 5 to 6 hours, so it is better to do it at night or in the morning so that you can enjoy it by the evening.
Before serving, remove the container of homemade ice cream with cream from the freezer and place in the refrigerator for 20 minutes. Roll the prepared ice cream into small balls using a tablespoon (if you don’t have a special ice cream spoon) and place in tall glasses, bowls or plates. Ice cream can be decorated with grated chocolate or berries. Serve immediately. Bon appetit!
Recipe 6: how to make ice cream from milk? (step by step photos)
- milk - 2.5 cups
- sugar - 1 glass
- vanillin - to taste
Pour the milk into a homemade saucepan, bring the milk to a boil, then remove the saucepan from the stove and let the milk cool to a temperature of 36 degrees.
Add sugar and vanillin to the egg yolks (if you want to make vanilla ice cream and not a regular ice cream). Mix well and grind the mass. You can use a blender for this.
Stir the resulting mass constantly, pouring milk into it in a thin stream.
Heat the final mixture over low heat, while continuing to stir. The mixture should become thick.
Cool the resulting mixture and our cream first, then place it in the refrigerator.
Pour the cream into a separate bowl. Whip the cream until it becomes thick.
Add whipped cream to the cooled cream and mix the mixture.
Transfer the mixture into a plastic container, cover with a lid, and place in the freezer for one hour. Then we take out the slightly frozen mixture, beat it with a mixer and place it in the freezer again. We repeat the procedure again.
Then we leave the mass of future ice cream in the freezer for 3 hours. Now our ice cream is ready. To soften the ice cream slightly, place it in the refrigerator for 20 minutes before serving.
Recipe 7: delicate chocolate ice cream (with photos step by step)
As you know, homemade ice cream is much tastier and healthier than store-bought ice cream. I suggest making homemade chocolate ice cream. It turned out soft, homogeneous, without ice grains. It has a rich chocolate taste and color.
- 50 g chocolate;
- 3 glasses of milk;
- 4 yolks;
- 200 g sugar.


Fold the beaten yolks into the chocolate-milk mixture. To prevent the yolks from curdling, add them gradually and stir immediately. Place over low heat and cook, stirring constantly, until thickened, without allowing the mixture to boil.

The consistency of the mixture should be such that if you run your finger across the spoon, a trace will remain.
Pour the homemade chocolate ice cream mixture into a freezer-safe pan, cover with film or foil and place in the freezer to freeze for 3 hours.

Separate chicken yolks from whites. Beat the yolks with three tablespoons of powdered sugar until the yolk mass is clear. Beat the egg whites to stiff peaks with the remaining powdered sugar.

Pour milk into the yolk mixture and whisk with a whisk.

Beat the cream with a mixer until creamy. Add condensed milk. Stir until smooth.

Add the yolk-milk mixture and vanillin to the creamy mixture. Whisk.

Add whipped whites. Beat with a mixer or whisk.

Cover the container with cling film and place in the freezer. After an hour, remove the ice cream and stir. Repeat this procedure 2-3 more times and leave until completely frozen.

Homemade ice cream is ready!

Everyone loves him - both adults and children. Ice cream is a product that will probably never cease to be in demand. But the question arises: is it possible to prepare your favorite delicacy at home? Let's figure it out.
History of ice cream
This delicious delicacy, beloved by almost everyone, is already more than 5 thousand years old. Yes, back in 3000 BC, the Chinese elite treated themselves to a dessert made from a mixture of snow, ice, lemon, orange and pomegranate seeds. And the recipe for this delicacy and another, simpler one, made from milk and ice was kept secret for several millennia, and was revealed only in the 11th century AD.
In ancient times, there are also many references to ice cream - both in Greece and Rome. Hippocrates spoke about its benefits. And during the reign of Alexander the Great, people loved to feast on frozen berries and fruits.
Slaves were sent to the mountains to get snow, and they even trained specifically to be able to run fast. After all, it was necessary to fly from the mountains before the snow melted.
And at the very end of the 13th century, Marco Polo from his travels brought to Europe a new recipe for a delicacy, for freezing which saltpeter was used. From that moment on, not a single aristocratic or royal dinner was complete without ice cream.
The recipes were kept in the strictest confidence. And ice cream makers were the subject of envy and cruel intrigue among the nobility; they were even taken away from each other, lured by some tempting promises. And then more - the ice cream recipe, in general, became a state secret.
It’s strange to learn about this now, when dessert can be purchased at any grocery store, and, of course, you can cook it yourself. And it’s easy to make ice cream at home, even without an ice cream maker. The secret has come true.
Types of ice cream
Let's go back to our time. Modern delicacies can be classified according to composition, taste, consistency. For example, ice cream is divided according to its composition as follows:
- A delicacy based on animal fat (sealing, milk and butter).
- Ice cream made from vegetable fat (coke or palm oil).
- Fruit ice. A solid dessert made from juice, puree, yogurt, etc.
- Sorbet or sorbet. Soft ice cream. Cream, fats and eggs are very rarely added to the composition. Sometimes the recipe contains weak alcohol. Prepared from fruit and berry juices and purees.
There are a wide variety of tastes. Cold sweetness can be chocolate, vanilla, coffee, berry, fruit, etc. In general, there are more than seven hundred dessert flavors in the world. Of course, we are all accustomed to the fact that ice cream is a sweet product.
But in fact, it comes in all sorts of ways: with pork cracklings, garlic, tomato, and fish. The variety of your favorite dessert is simply amazing.
The division by consistency implies the division of ice cream into hardened (production), soft (catering) and homemade. We will look at how to prepare the latter in this article.

Ice cream calories
The calorie content of a product depends on its type. For example, 100 grams:
- ice cream - 225 kcal;
- cream ice cream - 185 kcal;
- milk delicacy - 130 kcal;
- popsicle - 270 kcal.
And also the energy value changes due to additives. The chocolate ice cream will already be 231 kcal. And if milk ice cream is prepared with chocolate, then it will have a higher nutritional value - 138 kcal. But still, even if you are on a diet, you can choose the least high-calorie dessert for yourself.
Interesting fact and healing recipe
By the way, it has been confirmed that ice cream is an excellent prevention of diseases such as tonsillitis. And there is one recipe recommended by doctors as a cure for colds. For it you need to take 20 pine needles and raspberry syrup.
- Thoroughly crush the needles in a mortar, pour them into a bowl with syrup, mix well and strain into an ice cream container.
- Pour half a glass of natural orange juice onto the mixture, and place a sweet ball on top of it all.
The dessert contains a huge amount of vitamin C. This means that it is an excellent remedy for preventing colds.

How to make ice cream at home in an ice cream maker
With a wonderful device called an ice cream maker, you can easily and quickly make delicious ice cream at home. Here are 2 simple recipes for a device with a volume of 1.2 liters.
Needed: a glass (250 ml) of full-fat milk and cream and 5 tablespoons of sugar. Before loading into the ice cream maker, all components are thoroughly mixed; it is better to use a mixer for this. Place the mixture in a container and then cook according to the instructions.
Important! The bowl of the device should not be filled more than halfway.
To prepare ice cream you need: 350 ml of heavy cream, a glass of milk, 5 tablespoons of sugar and 3 yolks. Mix milk and cream, pour into a thick-bottomed saucepan and place on the stove (medium heat). The mixture must be heated to 80 °C, stirring constantly.
Important! Under no circumstances should you bring it to a boil!
Separately, you need to prepare the yolks beaten with sugar. Now you need to equalize the temperature of the creamy milk mixture and the yolks. To do this, first add a little hot cream (stirring continuously) to the yolks, and then pour the yolks into the cream.
The mass must be put back on the fire and continue to cook until it thickens. In advance, you need to place a bowl under this mixture to cool in the refrigerator. Then pour the thick mixture into it. Stir vigorously until cool. And only when the mixture reaches room temperature pour it into the ice cream maker.
These ice cream recipes are basic. They can be supplemented with any flavoring components.

Ice cream at home - step by step photo recipe
Do you know about such a special ice cream as premium ice cream? It is beyond the means of the average buyer and is very expensive. After all, it is made from natural ingredients.
But with a little work, you can create real ice cream with berries at home, without special ice cream makers, no worse than the one you were staring at without being able to enjoy it.
Which berry would be best in this ice cream? Any, choose according to your taste - cherries, cherries, raspberries, strawberries. You can maneuver with flavor nuances, highlighting those that you like. For example, 50 g of your favorite chocolate or the same amount of lemon juice will help you with this.
This ice cream recipe can be tweaked slightly to add some adultness to it. To do this, just pour a little liqueur into the cooled mass.

Cooking time: 5 hours 0 minutes
Quantity: 5 servings
Ingredients
- Heavy cream: 2 tbsp.
- Sweet cherries (any other year): 2.5 tbsp.
- Milk: 0.5 tbsp.
- Sugar: 0.5 tbsp.
- Salt: a pinch
Cooking instructions

How to make homemade milk ice cream
In order to make delicious homemade milk ice cream at home, you need to take the following ingredients:
- liter of milk;
- 5 yolks;
- 2 cups sugar;
- 100 gr. butter;
- a small spoon of starch.
Preparation:
- Place the butter in a saucepan, pour in the milk, put it on the stove and bring the mixture to a boil, stirring constantly. And immediately remove the container from the heat.
- Whisk the yolks, sugar and starch until smooth.
- Add just a little milk to the yolk mixture. You need so much liquid that it (the mixture) has the consistency of liquid sour cream.
- Place the bowl with milk and butter back on the stove, pour in the yolks and sugar. The entire composition must be continuously stirred with a spoon.
- When the resulting mass boils, it must be removed from the stove and the pan must be placed in a pre-prepared container with cold water to cool. The main thing is not to forget to stir the ice cream tirelessly.
- After cooling, the cream should be poured into molds or placed directly in the pan in the freezer. However, if you put the future ice cream in a pan, you need to remove it every 3 hours and mix the mixture thoroughly. This is necessary to prevent ice from forming inside the ice cream.
This delicacy will please everyone in the family, without exception.

How to make homemade ice cream from cream
With the addition of cream to homemade ice cream, it will become even richer and tastier than ordinary milk ice cream. Here you need to prepare the following components:
- heavy cream (from 30%) - a glass;
- milk - a glass;
- yolks - from 4 to 6 pieces;
- granulated sugar - half a glass;
- a teaspoon of vanilla sugar.
Preparation:
- Boil the milk, then remove it from the stove and cool. It should be warm. If you have a special thermometer, you can control the temperature. You need 36–37 °C.
- Beat the yolks and regular sugar plus vanilla.
- Continuously whisking, pour the yolk mixture into the milk in a thin stream.
- Place everything on the stove over low heat, stirring continuously with a wooden spoon until the mixture becomes thick.
- Place the cooling container in a cool place.
- In a separate bowl, beat the cream until scallops form and add them to the cooled mixture. Mix.
- Transfer the resulting ice cream into a plastic container, close it and put it in the freezer for 1 hour.
- As soon as frost sets in the composition (in an hour or 40 minutes), you need to take it out and beat it. After another hour, repeat the procedure again. Place the ice cream in the freezer for 2 hours.
Before serving the ice cream, you need to transfer it from the freezer to the refrigerator for 20 minutes. Your imagination will tell you how to decorate it in cups (cream bowls).

How to make ice cream at home
There are many recipes for making ice cream. We'll consider two of them.
This ice cream combines only three ingredients: half a liter of 30% cream, 100 grams of powder (you can take fine-crystalline sugar), a little vanillin. The cream must first be cooled. By the way, the fatter they are, the fewer pieces of ice you get in the ice cream.
All components are whipped for 5 minutes until a stable foam forms. Transfer the resulting mass into a plastic container, cover tightly with a lid or film and place in the freezer overnight. And in the morning, take it out, let the deliciousness thaw a little and enjoy!
For the second recipe you need:
- 6 proteins;
- milk or cream (low-fat only) - a glass;
- heavy cream (needed for whipping) from 30% - 300 ml;
- 400 grams of granulated sugar;
- vanillin - optional, quantity - to taste.
Preparation ice cream at home:
- In a thick-bottomed bowl, mix cream with milk (or low-fat cream) and sugar (not all, 150 grams). Place the pan over low heat and stir constantly until the mixture is homogeneous. Then remove the dishes from the stove, cool and place in the freezer.
- Next, you need to carefully separate the whites. Pour the remaining sugar into a dry deep cup, pour in the whites and beat with a mixer with gradual acceleration. The foam should be such that even when the bowl is turned upside down, the mass remains motionless.
- Then you need to get well-chilled cream with sugar and pour the whites into it little by little, mixing everything carefully. A homogeneous mass should eventually form. After transferring it into the mold, put it in the freezer for one hour. After this time, take out the ice cream, stir and return it to the chamber. Repeat the steps after an hour and a half. And just 2 hours after that, the ice cream is ready!
A great video recipe for homemade ice cream - watch and cook!
Homemade Popsicle Recipe
You can make apple ice cream.
For cold apple sweetness you need:
- 1 medium apple;
- half a teaspoon of gelatin;
- half a glass of water;
- 4 teaspoons granulated sugar;
- lemon juice - added to taste.
Preparation homemade popsicles:
- First, soak the gelatin for 30 minutes in 2 tablespoons of chilled boiled water.
- Dissolve sugar in boiling water. Mix the swollen gelatin with syrup and cool.
- Prepare applesauce.
- Mix the cooled syrup with gelatin and puree, add a little lemon juice.
- Pour the mixture into special molds, which only need to be filled 2/3 full. It should be taken into account that when frozen, the ice cream will become larger in size. Now you can put the ice cream in the freezer.
That's it, apple ice cream is ready!

How to make popsicles at home
In the summer heat, you always want to eat something cold and always very tasty. Popsicles would serve as such a delicacy. This is the name of ice cream covered with chocolate glaze. Or you can get double the pleasure and make a chocolate popsicle.
First we make ice cream. To prepare it you will need:
- half a liter of milk,
- half a glass of water,
- 3 tablespoons cocoa powder,
- 2 tablespoons granulated sugar,
- half a teaspoon of vanilla extract.
Preparation:
- Mix milk and water in a bowl. By the way, water can be replaced with cream.
- Add dry ingredients and vanilla and stir until completely dissolved.
- Pour the resulting mixture into popsicle molds or an ice tray, or some other tall and narrow device.
- Insert a stick into the center of each mold.
- Leave the mixture in the freezer for at least 3 hours.
And now the icing:
- Take 200 grams of chocolate and butter. Melt the chocolate in a water bath and mix with melted butter. You need to let the glaze cool a little, but it should still be warm.
- Pre-spread parchment paper in the freezer. We take out the frozen ice cream, dip it in the glaze, let it cool a little time and put it on parchment.
This kind of ice cream, especially if you make it yourself, will allow you to easily and happily survive the hot weather.

Easy Vanilla Ice Cream Recipe
Ice cream with vanilla according to this recipe is simply finger-licking good!
Ingredients:
- vanillin - 2 teaspoons;
- cream 20% - glass;
- milk - 300 ml;
- a pinch of salt;
- sugar - half a glass;
- 2 eggs.
Preparation homemade vanilla ice cream:
- Beat eggs in a bowl. Add sugar and work with a mixer until thick foam. Add salt and stir gently.
- Boil the milk. Carefully, little by little, pour it into the egg mixture, which is still whisking. Pour the resulting mass back into the pan where the milk was and put it on the stove again, turning the heat to minimum. You need to cook until the mixture becomes thick enough. This takes approximately 7 to 10 minutes. At the very end of cooking, add cream and vanillin to the pan.
- Once the mixture is ready, pour it into molds and cool. It is better to cool the ice cream completely in the refrigerator. And only then move the molds into the freezer.
There is hardly a person who can refuse such sweetness.

Banana ice cream - a very tasty recipe
Bananas are delicious on their own. And if you make such a delicacy as banana ice cream from them, you will get such a delicious treat - “you won’t be able to pull it away by the ears”!
For the dish you need:
- 2 ripe (you can even take overripe) bananas,
- half a glass of cream,
- a tablespoon of powder and lemon juice.
Preparation:
- Place bananas cut into large pieces in the freezer for 4 hours.
- Then grind them in a blender until smooth.
- Add cream, lemon juice and powder to bananas. Beat well again.
- Place everything in the freezer for 2 hours.
- During this time, be sure to take out the mixture and stir at least twice.
- Ready. Place the ice cream in a bowl and sprinkle with grated chocolate.
Bon appetit!

How to make chocolate ice cream at home
No store-bought ice cream can compare in taste to a delicacy you make yourself. And even more so for chocolate deliciousness made at home. There are many ways to make this ice cream.
Here you can use dark or milk chocolate as the main ingredient, or just cocoa powder. Or combine cocoa and chocolate in one recipe. We'll look at how to make ice cream using milk chocolate.
So, Components:
- milk chocolate - 100 gr.;
- fine crystalline sugar - 150 gr.;
- 4 eggs;
- cream (can be replaced with full-fat sour cream).
Cooking process homemade chocolate ice cream:
- We first take the eggs and separate the whites and yolks. Melt the chocolate. The yolks need to be beaten thoroughly. While whipping, add slightly cooled chocolate.
- Now you need to work on the proteins combined with sugar until you get a fluffy foam. At the same time, whip the cream (sour cream).
- Combine both egg mixtures into one uniform mass. Add cream while stirring continuously. Just not all at once, but gradually. Make the composition homogeneous and pour into containers prepared for ice cream. We put it in the freezer, taking the mixture out every hour (2-3 times in total) to mix. After the last mixing, put the ice cream in the freezer for another 3 hours. That’s it, the “amazingly delicious” delicacy is ready!
Important! The more chocolate is added to ice cream, the less sugar you need to use. Otherwise the product will turn out cloying!
A very simple recipe for homemade ice cream in 5 minutes
It turns out that ice cream can be made in just 5 minutes. And you don't need any special ingredients for this.
Only 300 grams of frozen (required) berries, chilled cream, half or a little more than a third of a glass and 100 grams of granulated sugar. You can use any berries, but strawberries, raspberries or blueberries (or all together) are ideal.
So, put everything in a blender and mix vigorously for 3-5 minutes. You can add a little vanilla to the mixture. That's all!
It is not forbidden to serve this ice cream immediately after preparation. And if you freeze it for half an hour, it will only get better.

The legendary Soviet ice cream is a taste of childhood for those born in the USSR. And with our recipe it is very easy to feel it again.
Compound:
- 1 vanilla pod;
- 100 gr. fine sugar;
- 4 yolks;
- a glass of the fattest milk;
- cream 38% - 350 ml.
Cooking Ice cream according to GOST from the USSR is like this:
- Grind 4 yolks and 100 grams of fine sugar thoroughly until white.
- Carefully remove the seeds from the vanilla.
- In a saucepan, boil milk with vanilla added to it.
- Pour milk in a thin stream into the beaten yolks with sugar.
- We put the mixture back on the fire and heat it, stirring constantly, to 80 °C. It is important not to let the composition boil! After this, remove the saucepan from the stove and cool. First, until room temperature is reached, then place the mixture in the refrigerator for 1 hour.
- The cream, previously cooled for 12 hours, is whipped fluffy.
- Combine the yolk mixture and cream and beat for a couple of minutes. Place the resulting mass in the freezer for 60 minutes. Then we take it out, mix or beat it, and back into the chamber. So 4 times.
- The last time you take out the mixture will be hard. That's how it should be. Break it apart with a spoon, stir vigorously, and put it back in the freezer.
- After half an hour, we take it out, mix it again and now put the ice cream in the chamber until it hardens completely.
Soviet ice cream is ready! You can enjoy it, remembering your happy childhood.

How to make ice cream at home - tips and tricks
Making ice cream at home means surprising your family with your favorite delicacy and at the same time taking care of the health of your loved ones. Because in this case you will always be sure of the naturalness of the product.
To make ice cream correctly, you need not only to follow the recipes, but also to put into practice some recommendations and tips:
- Sugar in ice cream can be replaced with honey.
- Instead of store-bought milk, use homemade milk. Just like cream. Then the ice cream will turn out much tastier.
- Chocolate, jam, nuts, coffee and many other products go well as an addition and decoration to the delicacy. There are no limits to your imagination. Sometimes all you need to do is look in the refrigerator and check out the kitchen shelves.
- Dessert cannot be kept in the freezer for a long time. It is made entirely from natural products, so the shelf life is low. It must be consumed within a maximum of 3 days. Although it is unlikely that he will stay that long.
- It is not recommended to refreeze melted ice cream!
- Before serving the dessert, leave it out of the refrigerator for 10 minutes. Then its taste and aroma will appear much brighter.
- When preparing a treat without an ice cream maker, it must be constantly stirred while freezing. During the entire cycle - from 3 to 5 times, approximately every half hour or hour.
The first recipe is the simplest of 2 ingredients. If you like vanilla taste, then add vanillin or vanilla sugar. If you want to make a popsicle, stock up on disposable cups and wooden sticks. Or “make” chopsticks yourself; to do this you need to break off the handle from disposable forks or spoons.
And if you don’t want popsicle, just put the finished ice cream in a container to store in the freezer.
Take:
- Cream from 33% fat content and above – 300 ml
- Condensed milk – 200 gr. (400 grams in a regular tin can). If you don’t like very sweet things, then take less condensed milk. Taste during cooking.
- Vanillin (optional)
Optional, if you want to make popsicle:
- Chocolate without filling - 90 grams
- 4 disposable paper cups, or special molds with ice cream sticks
It is better to pre-cool the cream, then it will whip better. And first whip at low speeds, increasing them after thickening. Beat for 2-3 minutes until light peaks form.
Gradually pour condensed milk and vanilla sugar into the mixture, if desired. Mix again until smooth.
Advice. Don't put a lot of condensed milk, it will be very sweet. And be careful, this ice cream tastes amazing, but is very high in calories.

Cover with cling film and place in the freezer for 40 minutes.
If you don't want to make chocolate covered popsicles, just put the ice cream in a container. Place in the refrigerator for 45 minutes, then stir and do this 3 times. After the last time, leave in the freezer for 3-5 hours.
In the meantime, we're making the glaze. To do this, melt the chocolate broken into pieces in a water bath or in the microwave.

Pour the melted chocolate into a glass. We tilt and twist it, distributing the chocolate along the walls of the glass.

Then turn the glass over and shake off excess chocolate. There should be a thin layer left on the walls of the glass.

Place the chocolate-coated cups in the freezer for 10 minutes.
Place ice cream in cups and insert sticks

and put it in the freezer for 4-8 hours.
We get the ice cream and we need to remove the cup from our popsicle. What we do

This is the kind of beautiful, tasty and healthy popsicle we end up with.

Video recipe
This is the easiest ice cream recipe ever. But not everyone can buy cream in the store. How to make cream yourself.
Cream of any fat content from milk and butter. Budget-friendly, natural and indistinguishable from store-bought ones
This is a simple and quick recipe for getting cream of the fat content you need from milk and butter.
- Take butter with a fat content of at least 72%
- Milk – any fat content
And now the ratio of milk and butter, depending on the required fat content of the cream:
- If you need 33% cream, then you need to take: 200 ml of milk and 200 grams of butter
- Cream 20-25%. Milk – 200 ml and 130 grams of butter
- Cream 10-15%. Milk – 200 ml, butter – 60 grams
Making cream is very simple. Put butter in milk. Heat until butter melts. And immediately remove from the stove. Do not bring to a boil!

Without letting it cool, beat the mixture in a blender for 7-10 minutes. This way the butter melts into one with the milk.
Pour the cream into a jar and, after cooling, put it in the refrigerator for 6-10 hours.
When you take them out, clumps may form on the surface. Just stir them.

This cream whips beautifully. The main thing is not to overdo it, otherwise the cream will separate into fractions of butter and buttermilk!

And this is a video recipe on how to make cream from milk and butter
ICE CREAM CREAM – BRULEE – a quick recipe for the lazy
This homemade creme brulee recipe is quick and easy. And in my opinion the most delicious!
You only need 3 ingredients:
- Boiled condensed milk – 200 grams (in a traditional tin can 400 grams)
- Milk from 2.5% fat – 200 ml
- Cream from 33% fat content – 400 grams (cool for 2 hours)
- Vanilla sugar - a pinch
Chill the bowl and whisk for 10-15 minutes in the freezer.
Place boiled condensed milk in a bowl, add vanillin to taste. Pour in a little milk and stir, adding milk little by little. You should end up with something like a syrup. And you don’t need to pour all the milk in there, otherwise ice crystals will appear during freezing due to excess liquid.
First whip the chilled cream at low speed; as soon as foam appears, the speed needs to be increased.
Beat until stable foam. But be careful not to overbeat until oil and whey form!

Now mix the milk and condensed milk with the same whisk until smooth. And start gradually adding the condensed milk mixture to the cream. But not all of it, but in small portions.

Once the cream mixture is thinner and slightly warmer, pour into the bowl with the remaining milk mixture.
Mix until you have a soft, airy mass of creme brulee color.

Transfer the creme brulee ice cream to a container and leave in the freezer for 6-8 hours.
Did you wait? Now put it in bowls and eat to your health. Mmmm, how yummy this is!

Creme brulee ice cream - a quick recipe. Video recipe.
- Ice cream made from cream is very tasty. But not cheap in these difficult times, because 1 liter of 30% cream costs about 450 rubles. Therefore, I offer a budget recipe for amazingly delicious ice cream. The approximate price is 70 rubles per 1 kilogram of delicious delicacy. But here you have to tinker a little.
In fact, this ice cream from the USSR is made from milk and eggs.
Here are the products you will need:
- Milk (fat content not less than 2.5%) - 0.5 liters
- Water - half a faceted glass (120 ml)
- Chicken eggs – 2 pieces
- Vanillin – 2 grams
- Citric acid - half a teaspoon
- Granulated sugar – 300 grams
- Butter – 50 grams (soft, so remove it from the refrigerator first)
- Starch (any, but corn is better) – 1 tablespoon
Place 400 ml of milk on the switched on burner. It should not be brought to a boil, but to the first bubbles.
In the meantime, let's make the cream. Why do we take eggs and separate the whites from the yolks. You probably know that you need to take eggs from the refrigerator, or put them there for about 20 minutes. Then the white will be better separated from the yolk. And you can conveniently separate it, for example, using a funnel.

Mix egg yolks with 100 grams of sand (5 heaped tablespoons)

Pour the remaining milk into it, mix thoroughly with a whisk and add 1 tablespoon of starch and beat again. Starch adds density and prevents ice cream from crystallizing.

Gradually pour the milk that has begun to boil into the mixture, continuing to stir. And put it back on the fire. On the stove we continue to whisk it continuously until the first signs of boiling appear. In this case, the mass should thicken a little.

Pour into another bowl. And as soon as it cools down, cover it with film and put it in the refrigerator.
While the mixture cools, pour half a glass of water and a pinch of citric acid into the remaining sand. Citric acid to prevent sand from crystallizing. Place on fire. This will be a syrup for sweetness.
And we begin to beat the whites, adding the remaining citric acid. The protein mass should remain in the bowl after we turn it over. Citric acid works so well in the process of beating egg whites. If there is no citric acid, you can add a pinch of salt.

Now we pour into the protein mass the syrup that has already boiled by that time, which we left on the stove. Pour in a little while it’s still hot and continue whisking.

Continue beating for about 5 minutes until a very thick protein cream forms. After that we place it in the refrigerator.
Beat butter and vanilla for about 2 minutes.

And while continuing to beat, little by little add the cream, that is, the yolk mass that we made at the beginning. When all the cream is mixed with butter, put it in the refrigerator.
When both mixtures are properly cooled. Take the egg yolk cream and start adding it a little at a time. And mix very gently. In order not to disturb the structure of the whipped egg whites.

Now you need to transfer the ice cream into a storage container and put it in the freezer for 2-3 hours. And you don’t need to touch it and stir it every half hour, it won’t turn into ice. Just take it out, put it on and enjoy!
Chocolate ice cream made from sour cream and milk.
Ingredients:
- Milk (Any milk, but it’s better to take fat milk) - 250 ml
- Sour cream (fat content 25-30 percent) – 350 g
- Granulated sugar – 100 grams
- Starch (any starch, but it’s better to use corn starch) – 2 heaped teaspoons
- Cocoa powder – 2 heaped teaspoons
- Chocolate – 50 grams
First, prepare the chocolate pudding for the ice cream. (By the way, if you don’t want to add chocolate, in this case you need to cook Vanilla pudding and then add white chocolate). In a bowl with a thick bottom, such as a cauldron, you need to pour out: sugar, cocoa and starch. Pour milk over everything and mix thoroughly with a whisk.
Bring to thicken over heat, stirring constantly. The signal to turn off will be puffing and the release of bubbles.

Immediately after turning off the stove, you need to add finely broken chocolate and, of course, mix thoroughly. Cover with cling film so that it comes into contact with the surface of the pudding. Otherwise, in the refrigerator, where it needs to be put away after cooling, a crust that we don’t need will form on it.
To make the pudding cool faster, place it in a bowl of cold water and add ice.

When the pudding is completely cold, add chilled sour cream and beat with a mixer for about 5 minutes. This is the product you will get.

Transfer the chocolate ice cream to a storage container or plastic cups. You can insert wooden sticks into the cups to make a popsicle.

Place in the freezer for 3-4 hours. And don’t forget to cover with cling film or foil to prevent the smell of the freezer from being absorbed.
After the required time has passed, lower the cup into hot water and remove the ice cream by the stick. To store, wrap each popsicle in foil.

This is a video recipe for chocolate ice cream with sour cream.
This is how easy it is to make delicious homemade ice cream. All the recipes are simple and only at first glance it seems that this is not so. Try it and you won't want to buy ice cream at the store anymore.


